
In my previous tutorial, I showed how to add a controller to an Application Code Manager project.
In this tutorial, we’ll start configuring the software for our machine by adding a Unit to the controller.
Before we start working in Application Code Manager, I want to explain a few important concepts first.
Machine Builder Libraries use an equipment framework developed by Rockwell Automation called Framework B for machine control. This equipment framework is based on two international standars:
The ISA-88 physical model describes how equipment is organized from the top level down and provides an easy-to-understand way to describe machines and their lower-level components.
.png)
At the top is the Enterprise, which is a manufacturing company.
Then the Site, which is a location where manufacturing takes place.
Within the Site, there are Areas which are where related manufacturing activities take place. An Area could be a single production line in a factory.
Below that is the Process Cell, which is a collection of units linked together to perform a task.
Under that is the Unit, which corresponds to what we'd traditionally call a machine.
Below each unit is one or more Equipment Modules.
Below Equipment Modules are Control Modules, which are generally physical sensors and actuators in a machine.
As implemented in Framework B, a Unit has the following features and functionalities:
The Unit has attachment points that let it receive commands from HMI inputs, physical inputs, and external inputs (usually SCADA or higher level systems) that affect the machine’s Mode and State.
The Unit indicates its current mode and state through an enumerated output and a bitwise output.
A Unit is considered to be Blocked if the downstream machine in a Process Cell is not available to receive parts from the Unit.
A Unit is considered to be Starved if the upstream machine in a Process Cell cannot supply parts to the Unit or required material is not available (e.g packaging material in a packaging machine).
With Framework B, a Unit can have a configurable delay time before transitioning to the Blocked/Starved state to prevent it from constantly transitioning to and from one of these states during normal operation.
We’ll talk more about Equipment Modules in the next tutorial but for now its good to know that a Unit can control and monitor up to 31 Equipment Modules.
The Unit aggregates the state of all the Equipment Modules below it to determine the state of the Unit and sends commands down to the Equipment modules to clear faults and start operations.
Now that we know what a Unit module is and what it does, let’s add one to our ACM project.
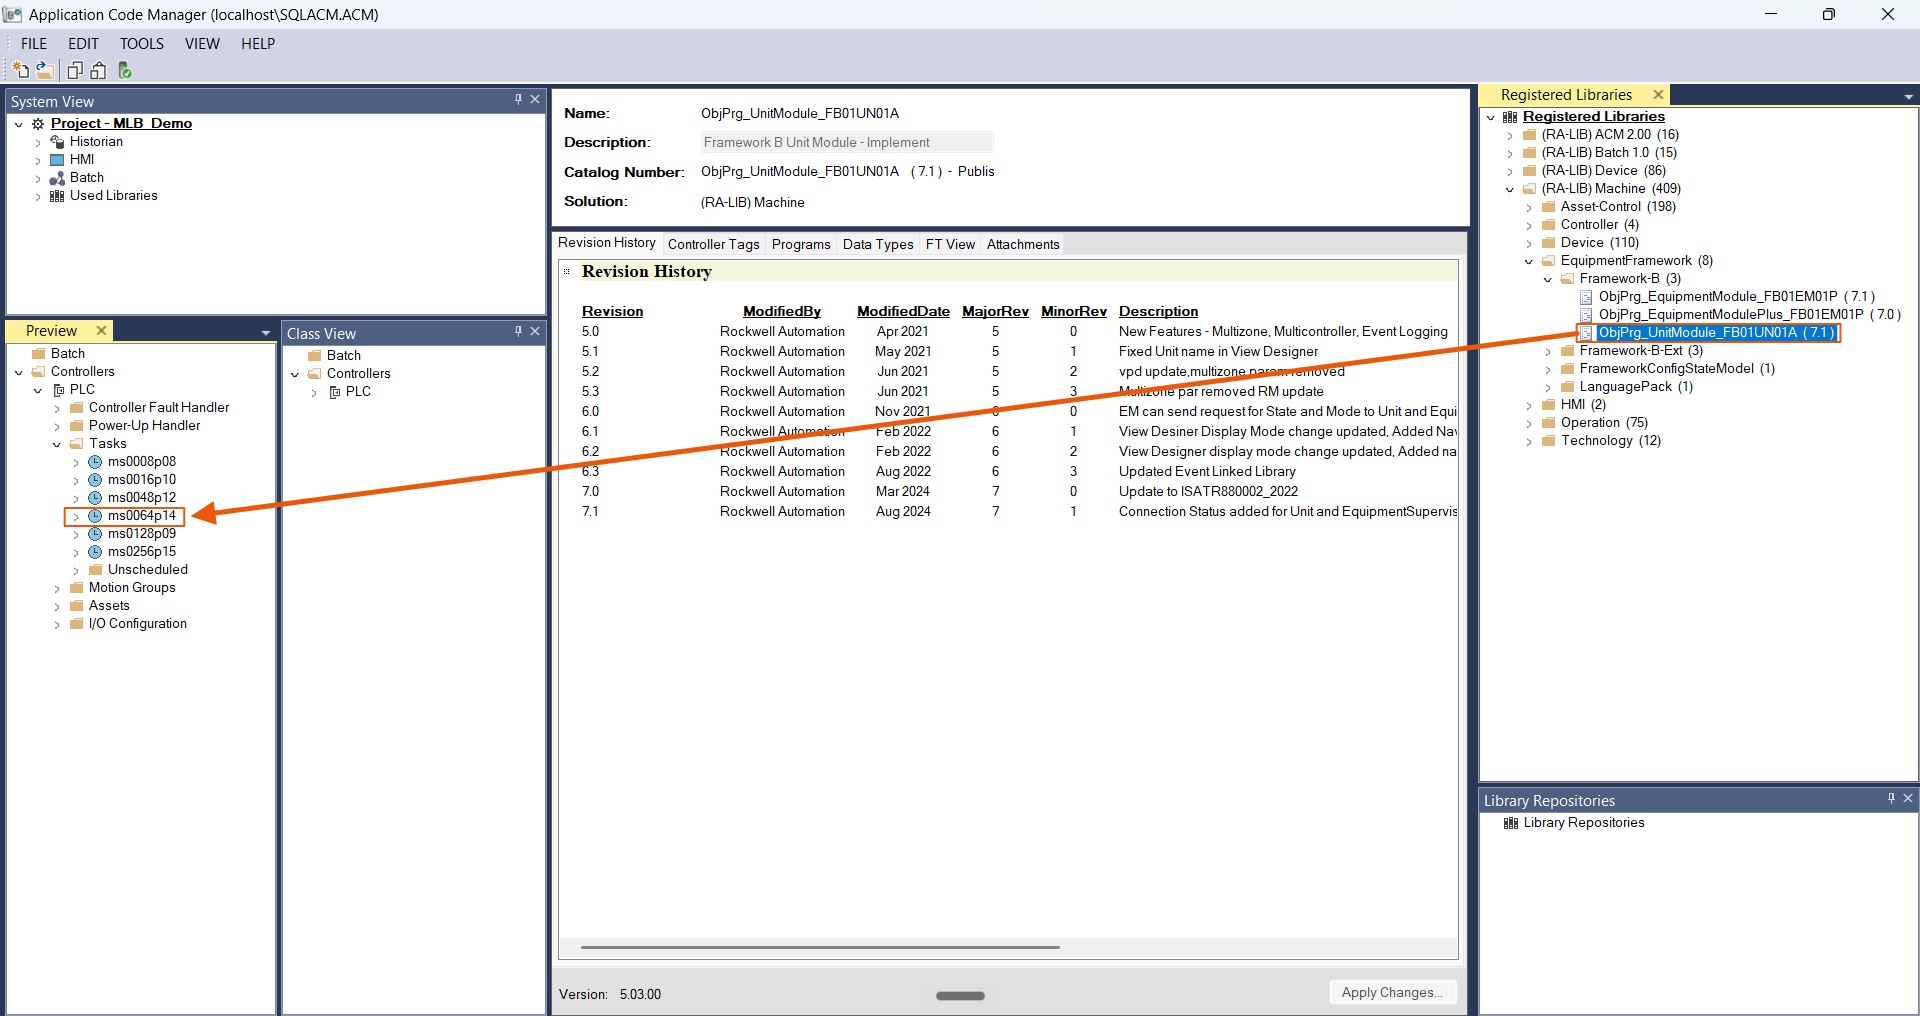
To add a Unit, locate the Unit Module object in the Framework-B section of the Machine Builder Libraries library. You can instantiate objects by dragging them from the library and dropping them onto the Controller Preview or Class View pane. Because the Unit is implemented as a program, you'll drop it onto a task. In this case, I use the 64-millisecond periodic task, since this level doesn't contain time-critical logic.
The Object Configuration Wizard opens.
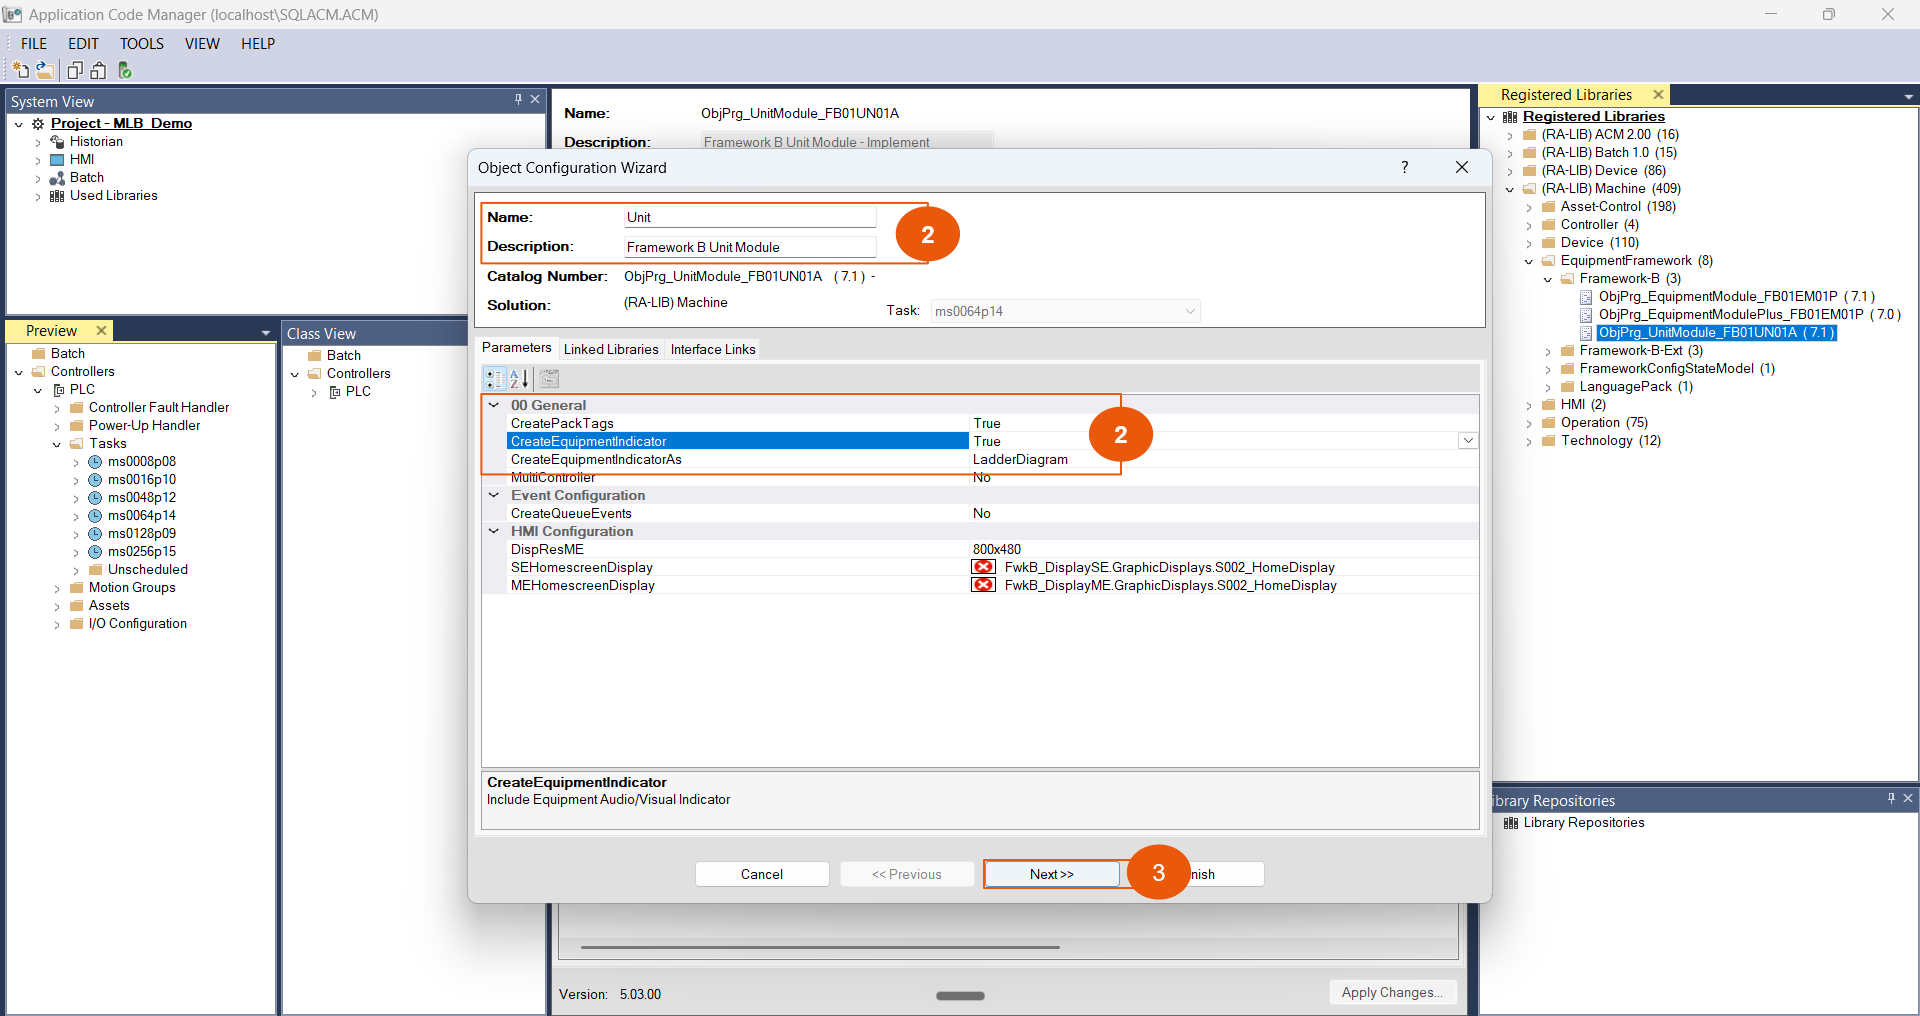
In this dialog, give the Unit a name and choose if you want to create PackTags and an Equipment Indicator.
PackTags make a machine easier to integrate into higher-level systems.
An Equipment Indicator is a 5 colour stack light that indicates the status of the machine.
Then click Next to move onto the Linked Libraries tab.
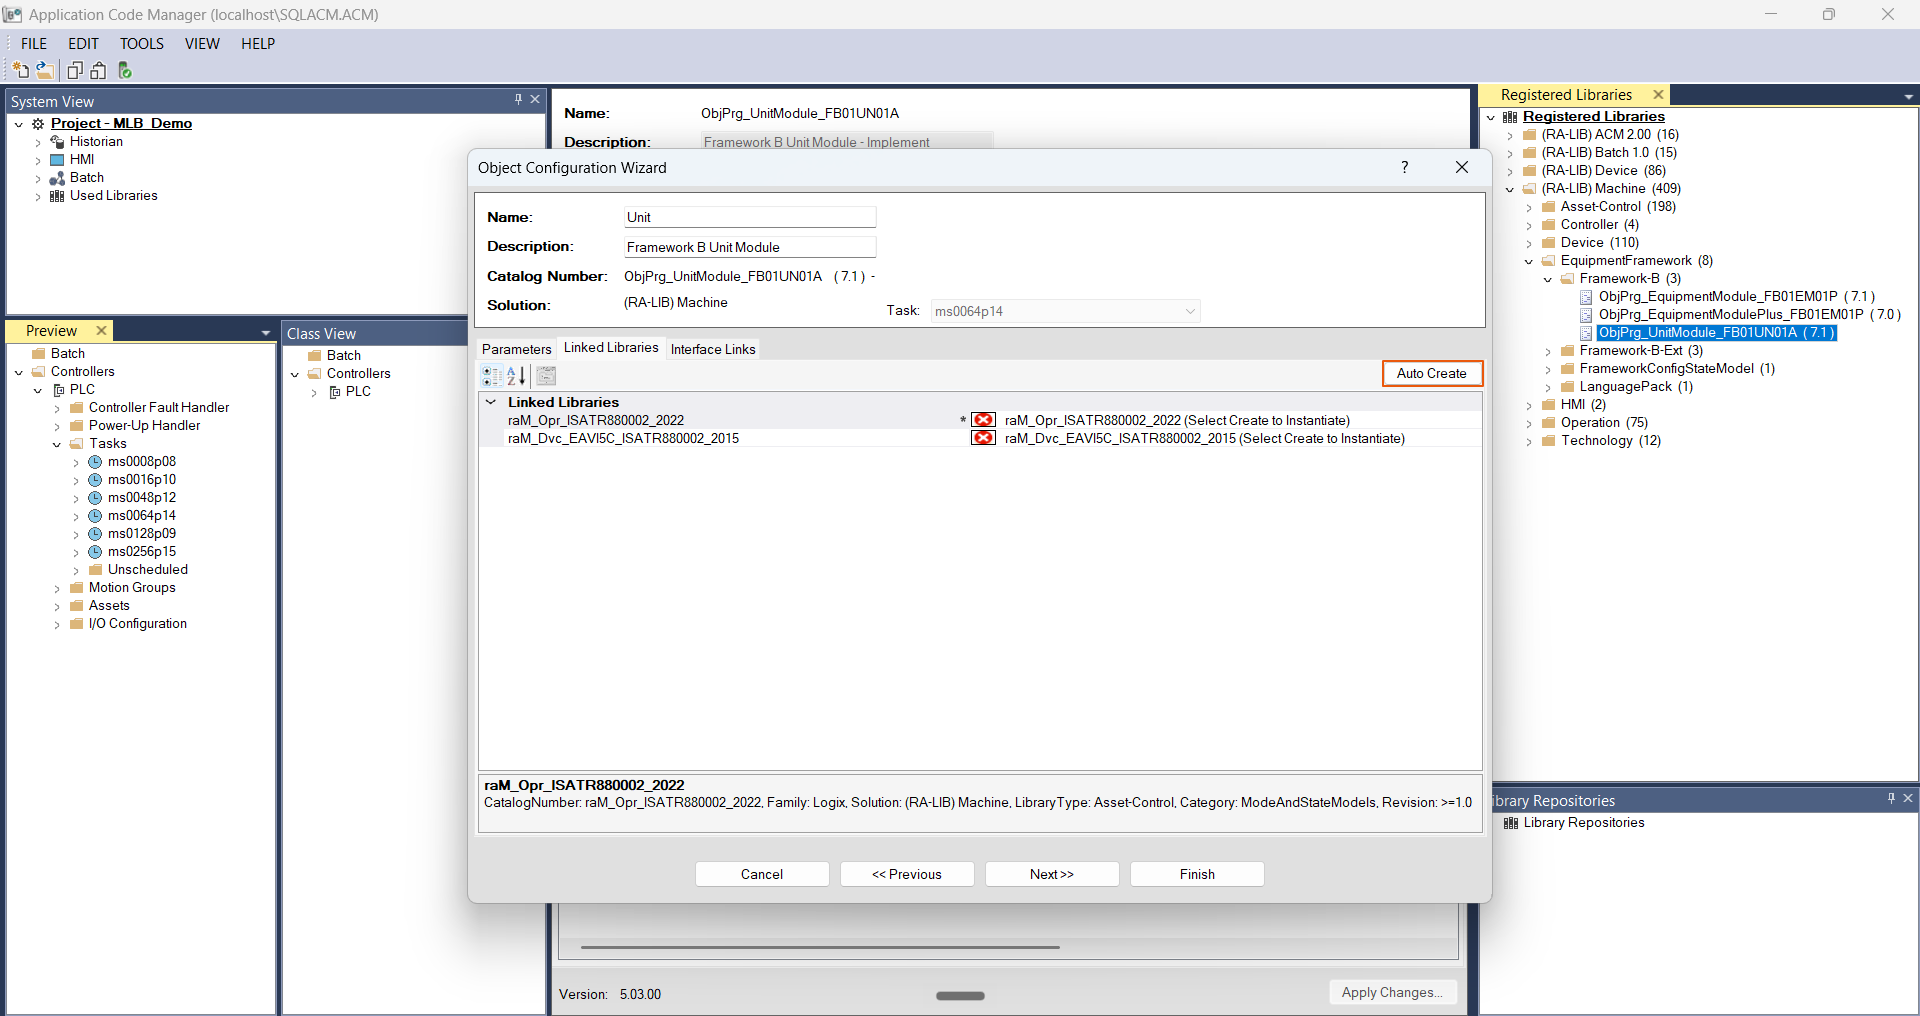
On the Linked Libraries tab, you'll need to link the Unit Module to its defining asset control objects. Asset control objects are additional software objects that are required by an asset, like a Unit, to work correctly.
Click Auto Create to have ACM generate these automatically.
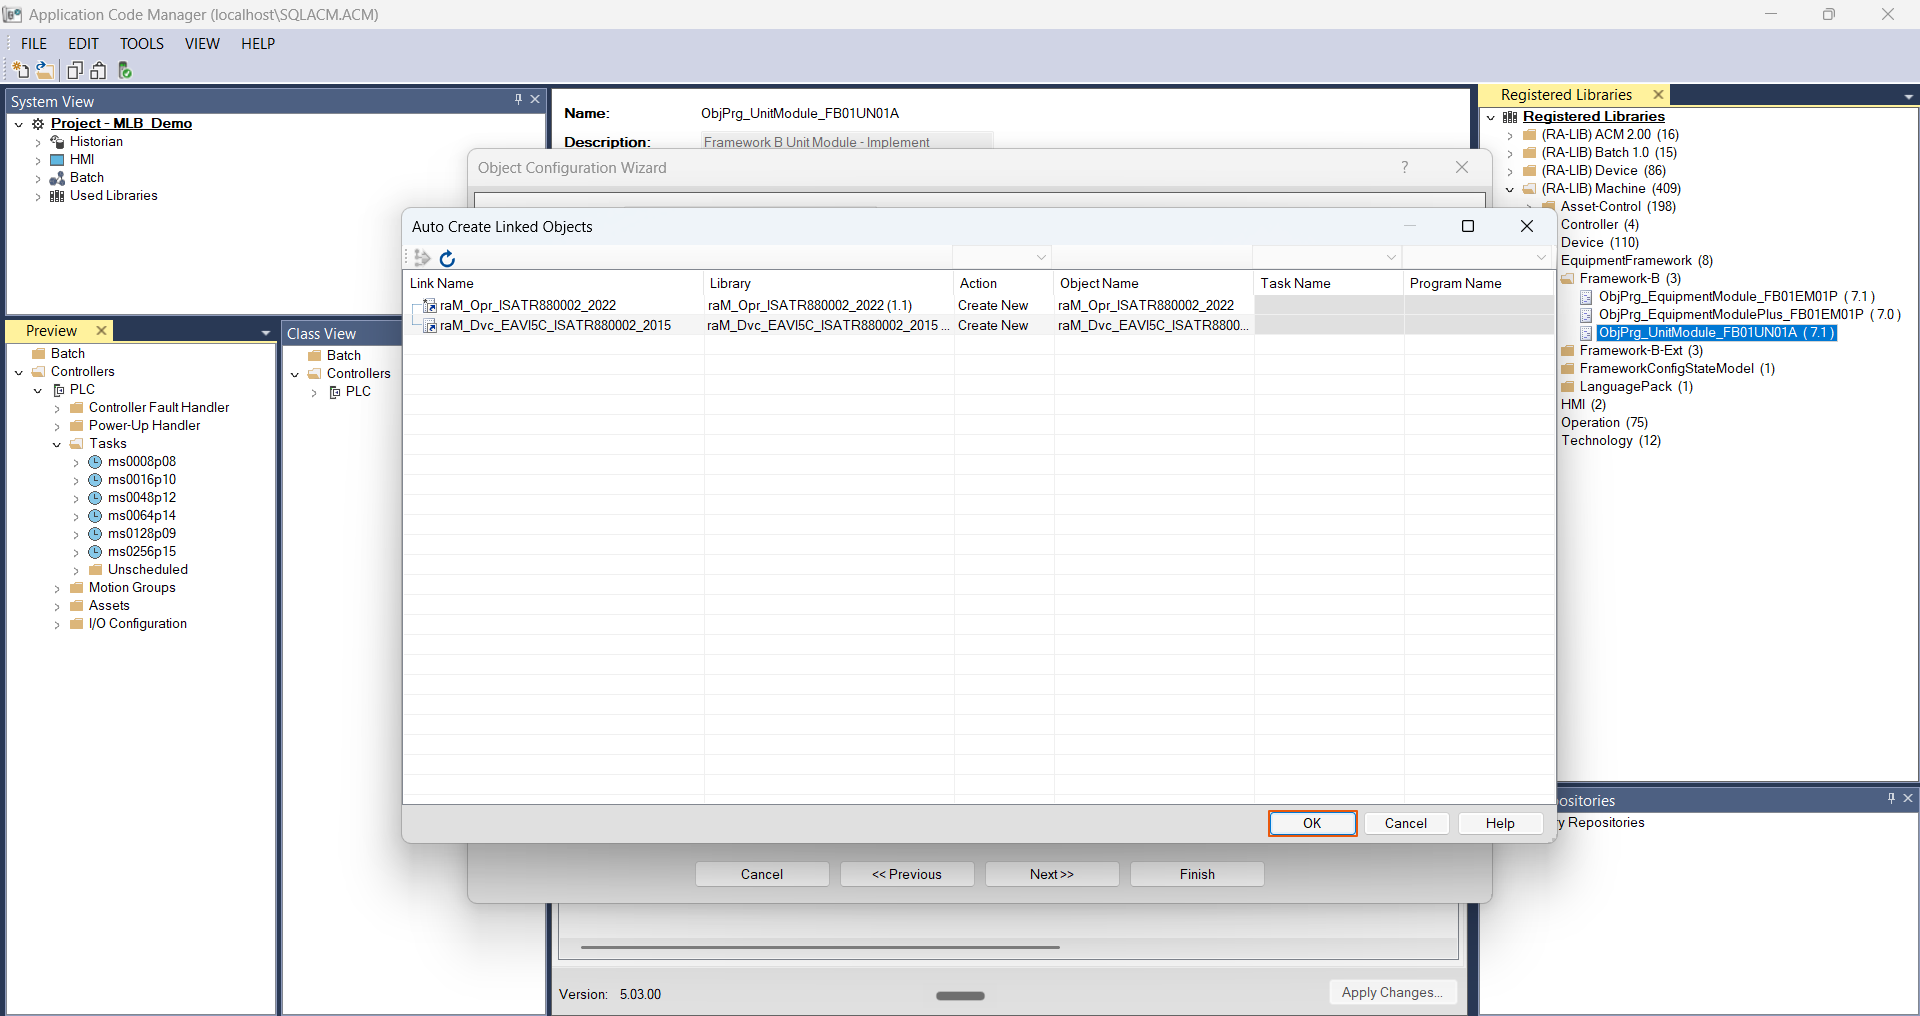
The Auto Create Linked Objects dialog opens. Click OK to accept the default names and create the Asset Control Objects.
Click Finish to finish configuring the Unit object.

The Unit object and its linked asset control objects are added to the project. As you can see, Application Code Manager has added the Unit program to the task in our project.
We’ll generate the Studio 5000 Logix Designer project and explore the structure of this code soon.

In this tutorial, we learned what a Unit is and how we can add one to an Application Code Manager project.
In the next tutorial, we will move one level down the hierarchy and add the required Equipment Modules to the project. You can find that tutorial here.
Get new content delivered straight to your inbox:
.png)
.png)