
Before you can instantiate any logic objects in an ACM project, you need a controller. In this tutorial, we’ll add a controller to our ACM project and look at what makes the Machine Builder Libraries controllers different from the standard ACM ones.
Quick note on versions: the free version of ACM limits you to a single controller per project and doesn’t support a shared remote database.
The subscription version removes both of those constraints.
For most machine builders, the free version is a solid starting point.
To add a controller, right-click the Controllers folder in the Class View or Preview pane and select Add New.

From the wizard, expand the CompactLogix section select the MachineBuilder_CompactLogix controller and click Next.
The difference between the ACM Controller and the MBL Controller is that the MBL Controller comes pre-configured with a range of periodic tasks, each with a different execution period and priority. That scaffolding saves you setup time and helps standardize the structure of your projects.

Give the controller a name, then configure its parameters. For this project, we’ll select a 5069 CompactLogix in DLR mode.

I also enable motion and give the motion group a name.

Finally, I click Finish to create the PLC.

The controller is added to the project. Because we chose the MBL version, several periodic tasks have already been created for us automatically.
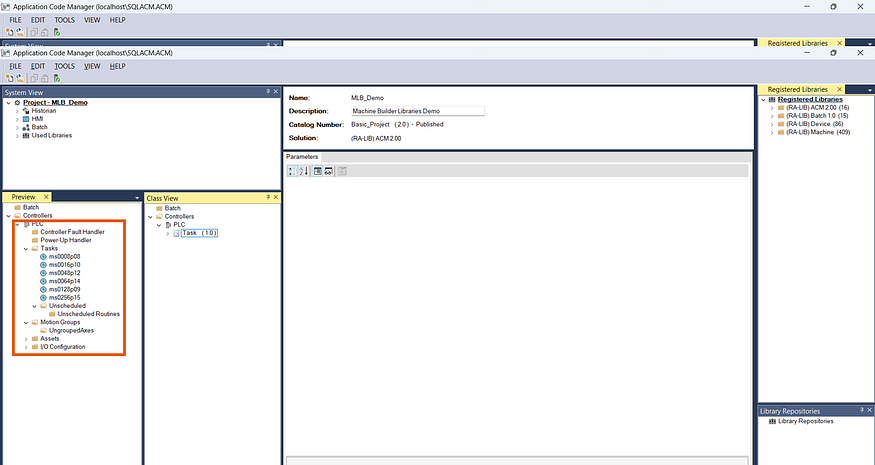
With the controller in place, we’re ready to start adding the structure of our machine.
In the next tutorial, we’ll add the Unit object that is used to manage the machine, talk about what a unit is, and talk about how a unit is implemented in Machine Builder Libraries. You can find that tutorial here.
Get new content delivered straight to your inbox:
.png)
.png)