In this video, I’ll show you how to import PLC tags to a FactoryTalk Optix project. By the end of the video, you will know how to create communication drivers, create stations, import tags online, import tags offline, and manually create tags.
This video was recorded using FactoryTalk Optix version 1.7. If you are using a different version of Optix, you may not be able to follow the steps exactly.
Let’s get started by adding a new communication driver.
Get the project from this video on GitHub:
https://github.com/kencbourke/Optix-ImportTags
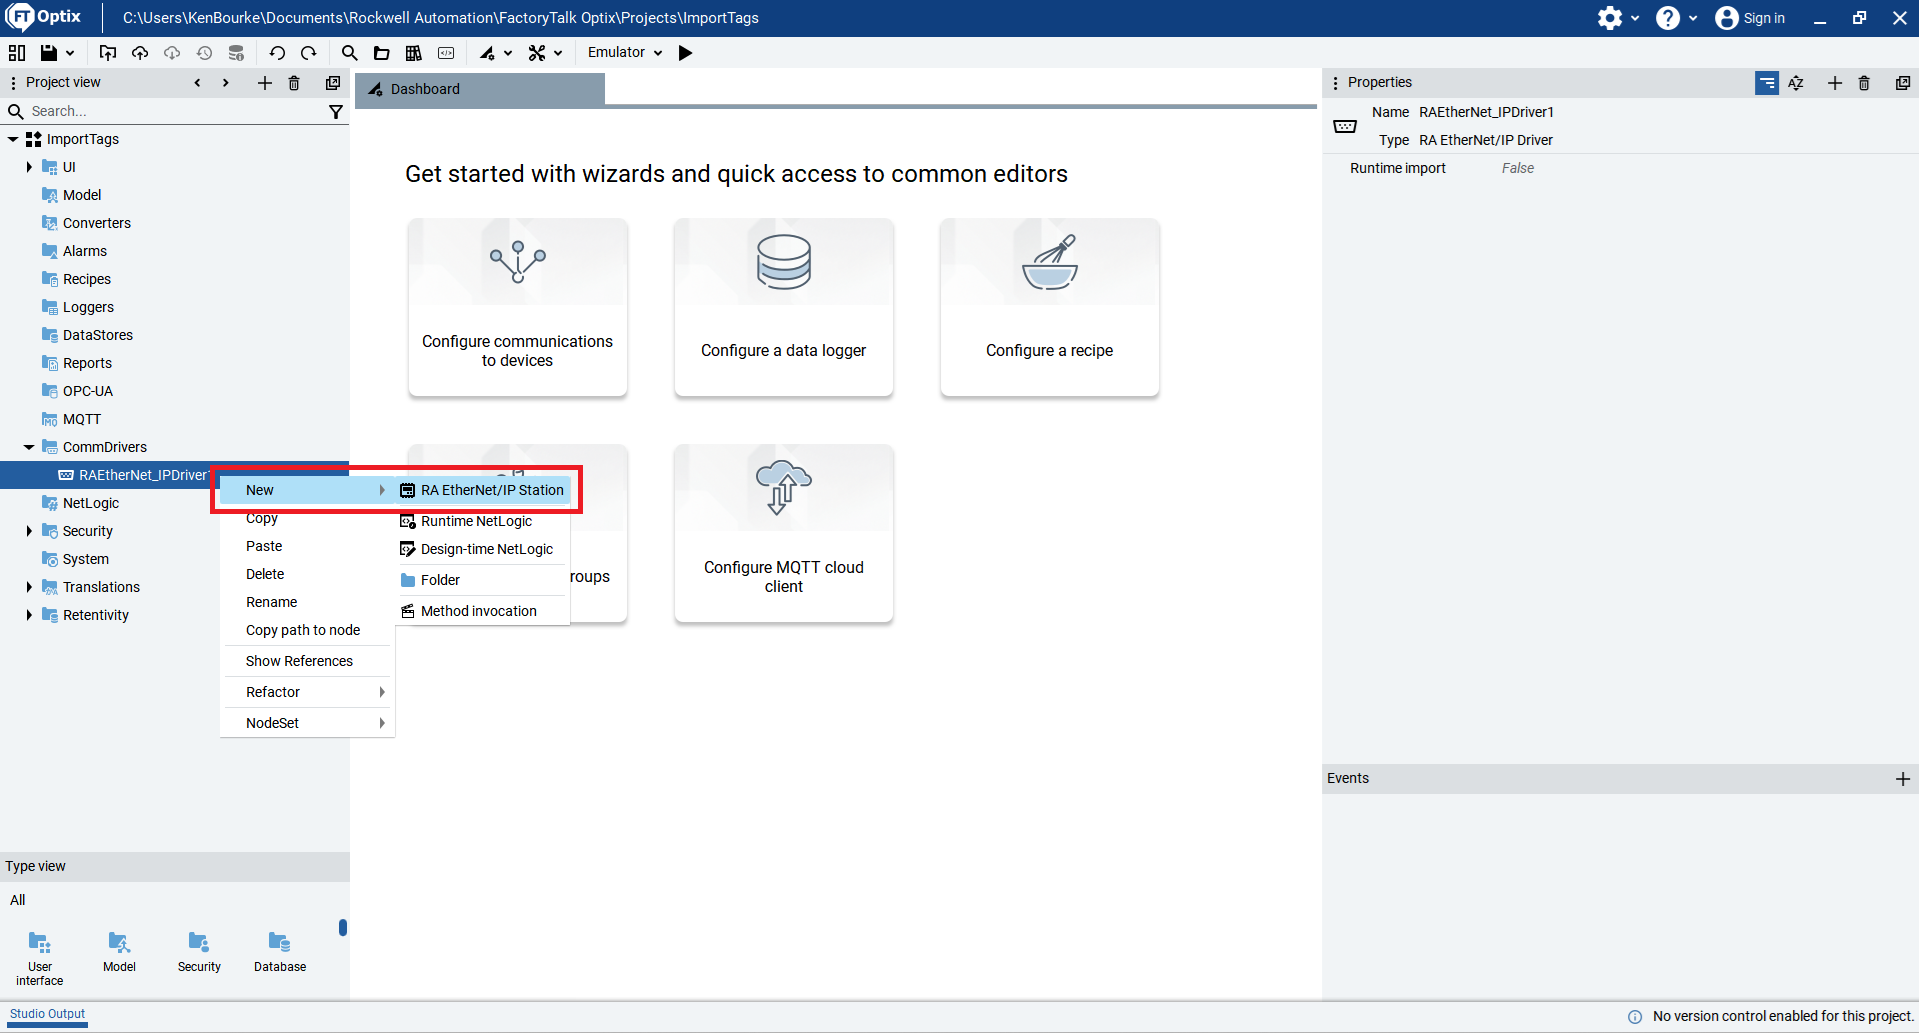
In FactoryTalk Optix, you can add a communication driver by right-clicking on the CommDrivers folder in the Project View pane and then hovering over the New menu item.
A submenu opens with a list of available communication drivers. As you can see from this list, even through FactoryTalk Optix is a Rockwell Automation product, it doesn’t only support EtherNet/Ip communication drivers. You can communicate with almost any type of PLC by using a native communication driver like the RA EtherNet/IP driver or the S7 TIA PROFINET driver or by using the generic Modbus or serial driver.
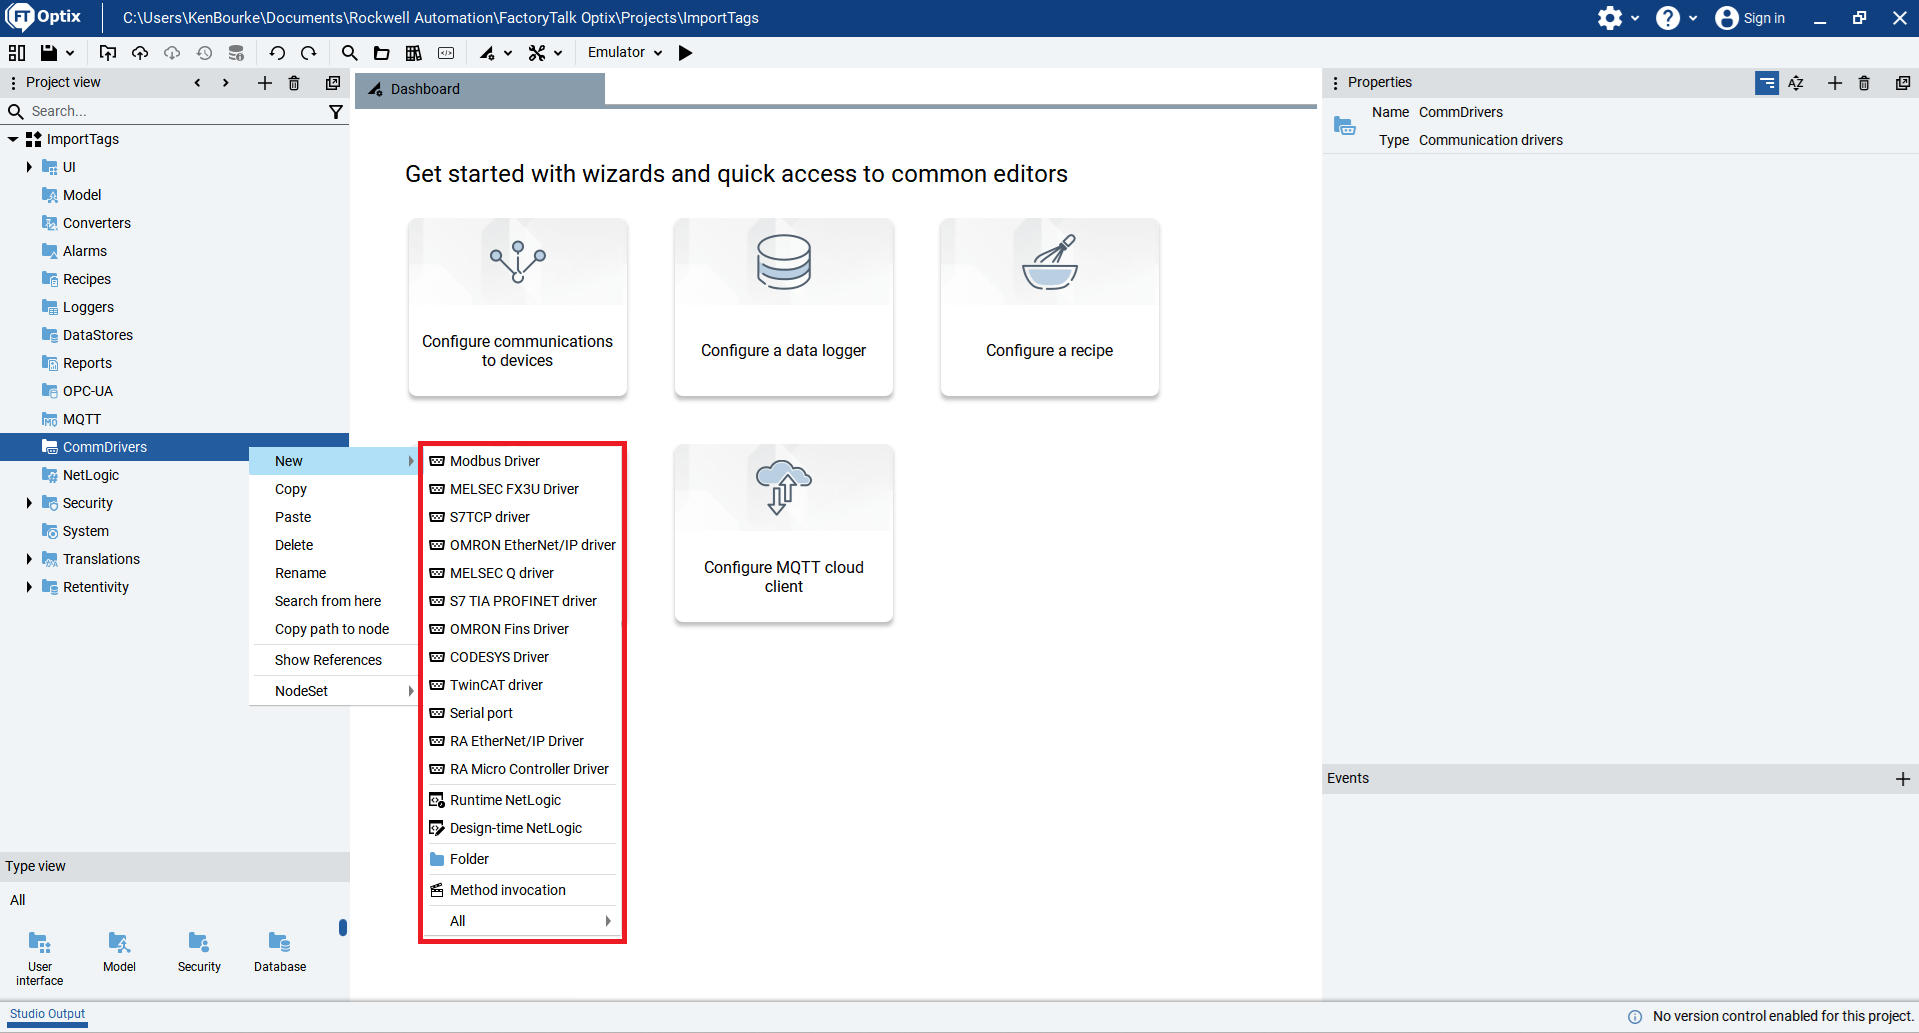
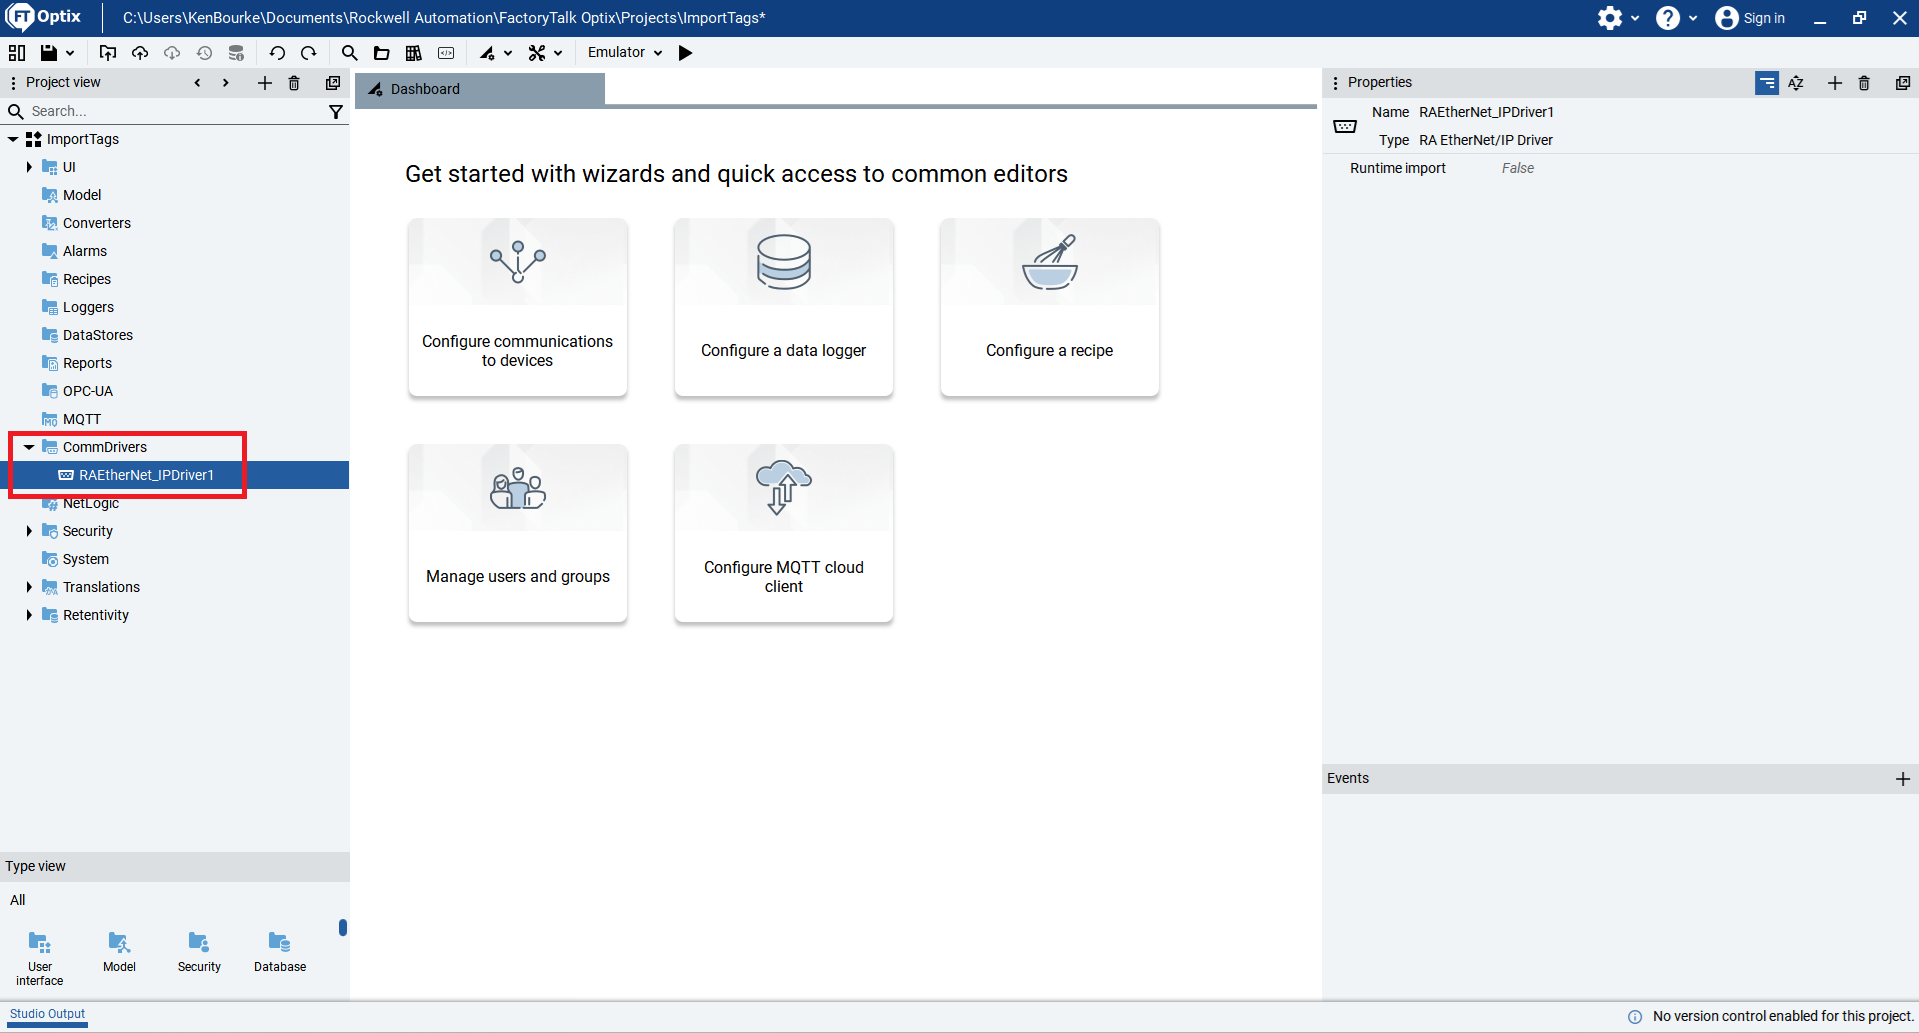
To add a communication driver to the project, select the type of driver that you want to add from the list. In this case, I add an RA EtherNet/IP communication driver to the project.
In this video, we’ll use an RA EtherNet/IP communication driver to import PLC tags online and offline. Not all of the communication drivers in FactoryTalk Optix support online and offline tag imports. This table gives a breakdown of which drivers support what tag import modes.

After configuring a communication driver, you can add a communication station to the driver. A communication station represents a physical controller.
To add a communication station, right-click on the communication driver and select New > RA EtherNet/IP Station. The actual text that you see will vary depending on the type of communication driver.
Once you have configured a communication station, you can import tags into your projects offline, which means that the tags are read from a project file, or online, which means that the tags are read from a controller.
Let’s see how to import tags offline to start.
To import tags offline, expand the station in the Project View pane and double-click on the Tag Importer to open it.
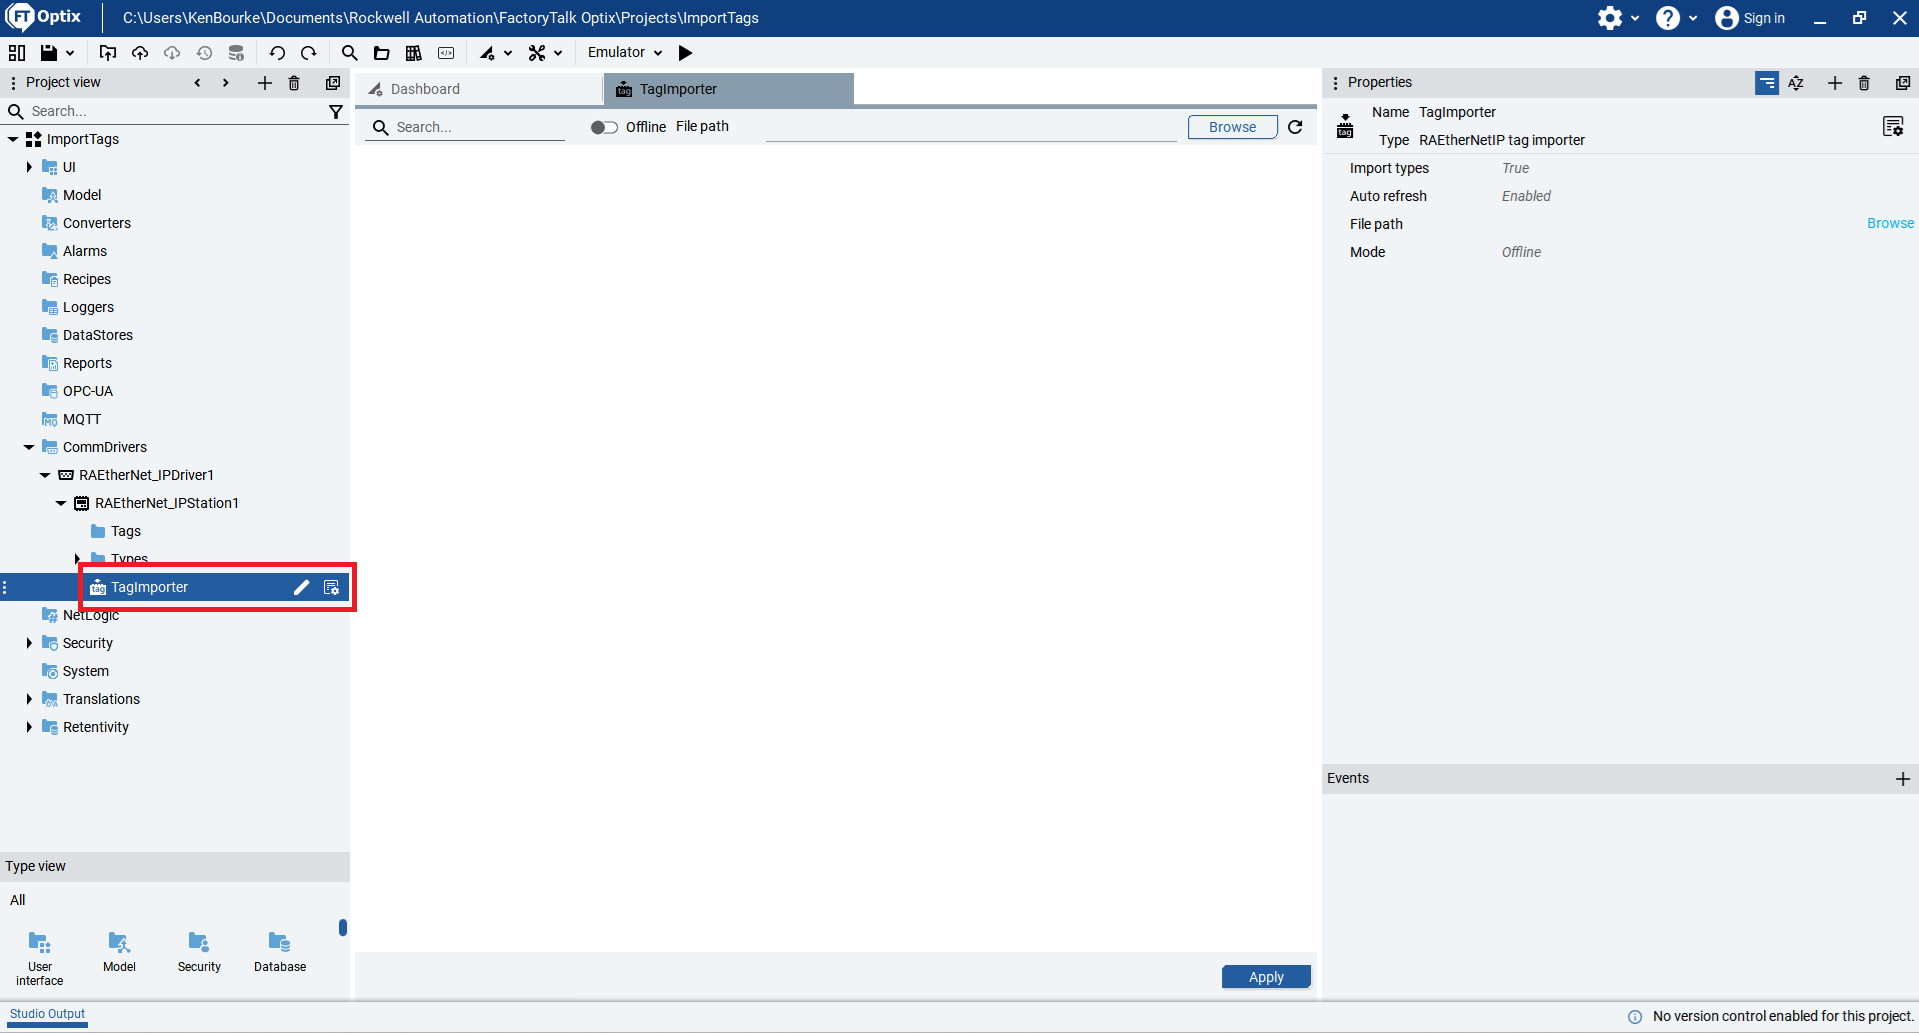
Then click the Browse button and browse for the project where you will import tags from.
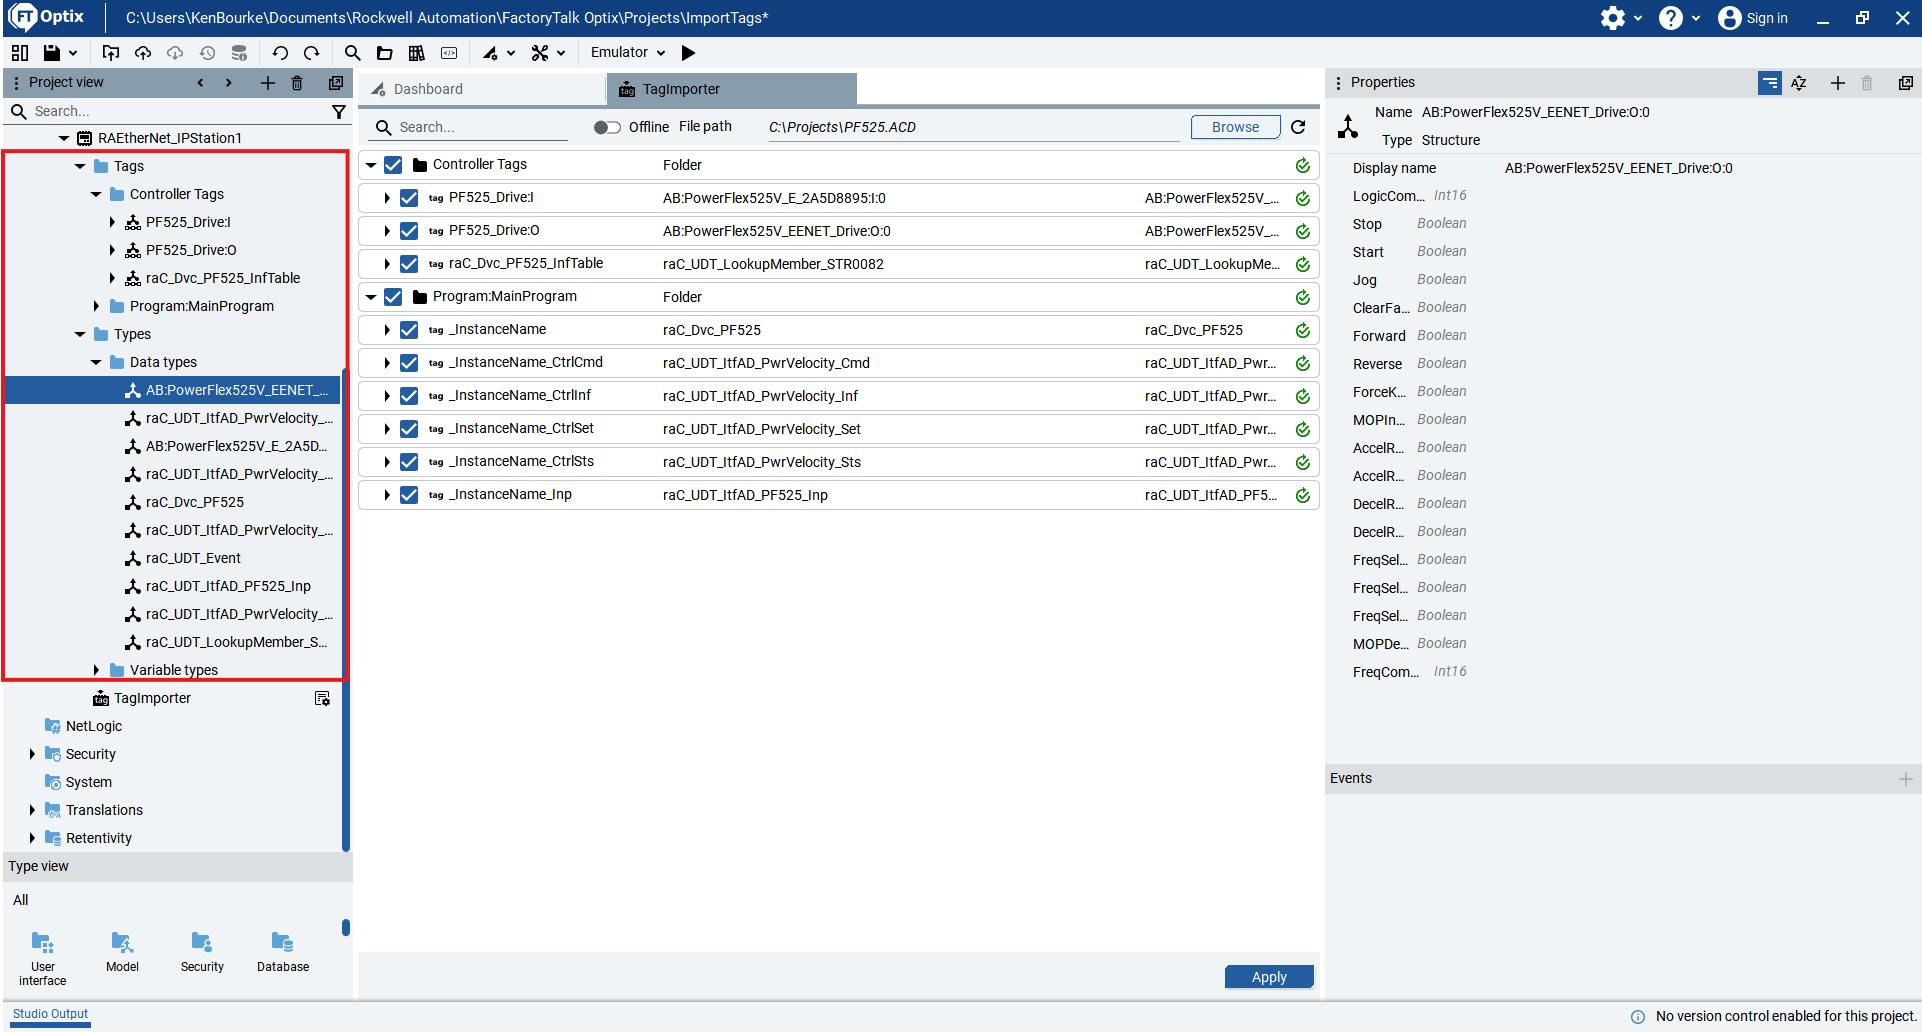
The tags are automatically read from the project and listed in the middle pane. From this list, you can select the tags that you want to import into the Optix project.
After selecting the tags to import, click Apply to import the tags**.**
The tags are now listed under the Tags folder of the EtherNet/IP station and can be used in the Optix project. If you imported structured tags, a type is created for the structured tags.
To import tags online, switch the Online/Offline toggle in the Tag Importer to online and specify the route to the controller. For a CompactLogix PLC or the native EtherNet/IP port on a ControlLogix PLC, the route is just the IP address of the PLC. For a ControlLogix PLC that uses Ethernet modules, the route uses the format [IP Address]\Backplane\[Slot]. For example, 192.168.1.20\Backplane\2.

FactoryTalk Optix will read the tags from the controller and list them in the center pane. Once again, you can select the tags that you want to import to the project and click Apply to import the tags.
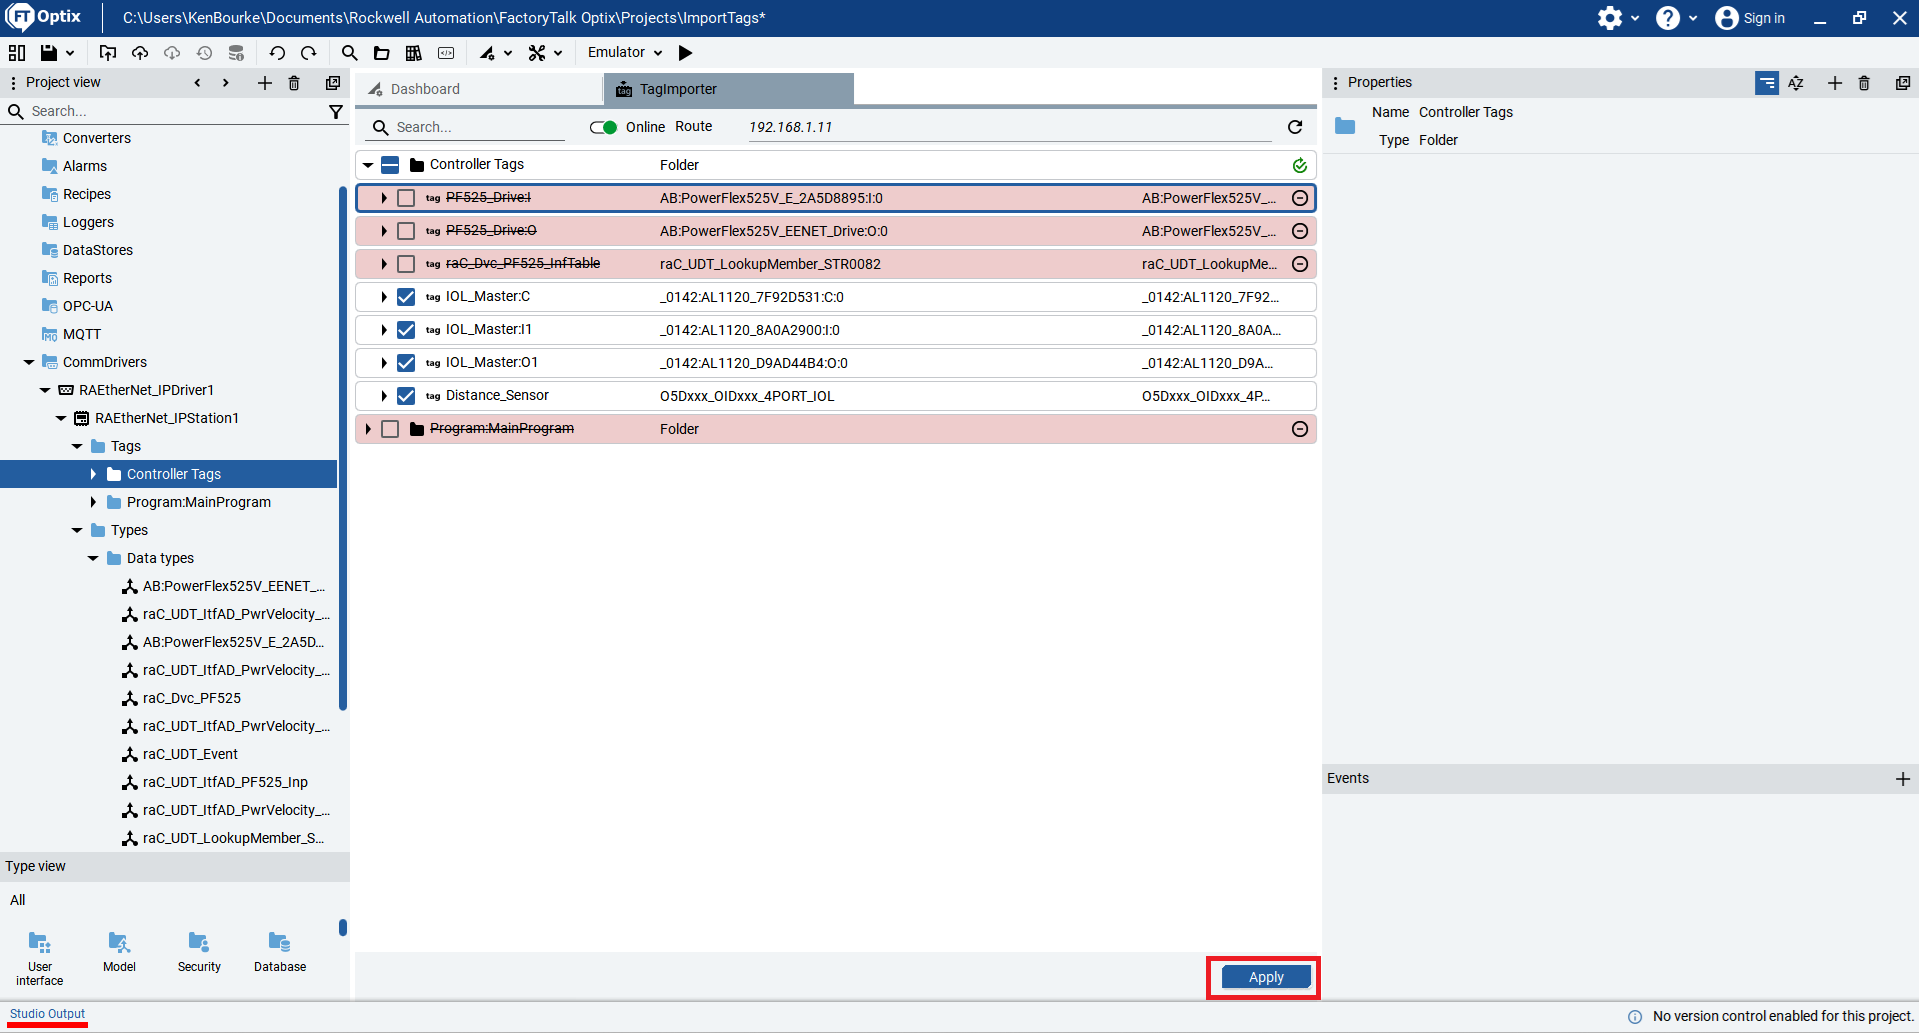
Now the offline tags have been removed and replace by the tags that have been imported online.

If something changes in your PLC program and you don’t want to re-import the tags or if you are developing a HMI application separately from a PLC project, you can also manually create tags in Optix.
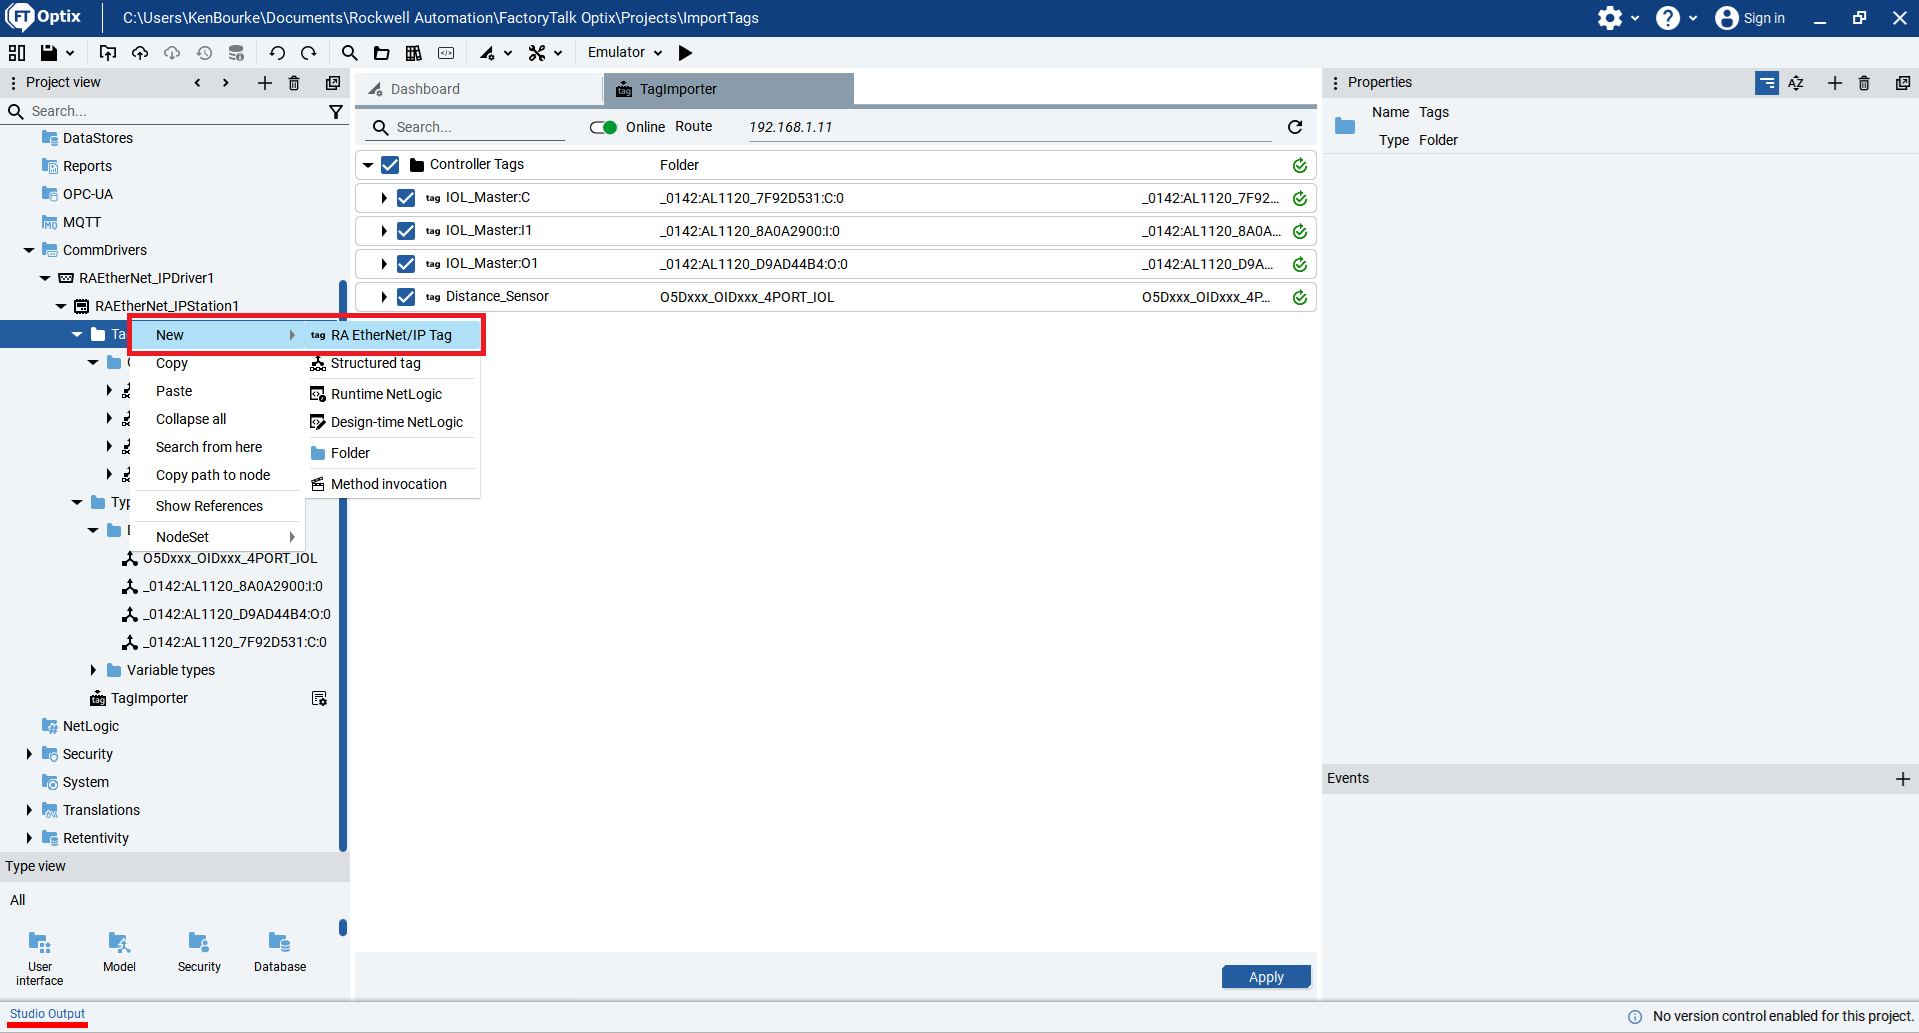
To do that, right-click on a station and select New > RA EtherNet/IP Tag
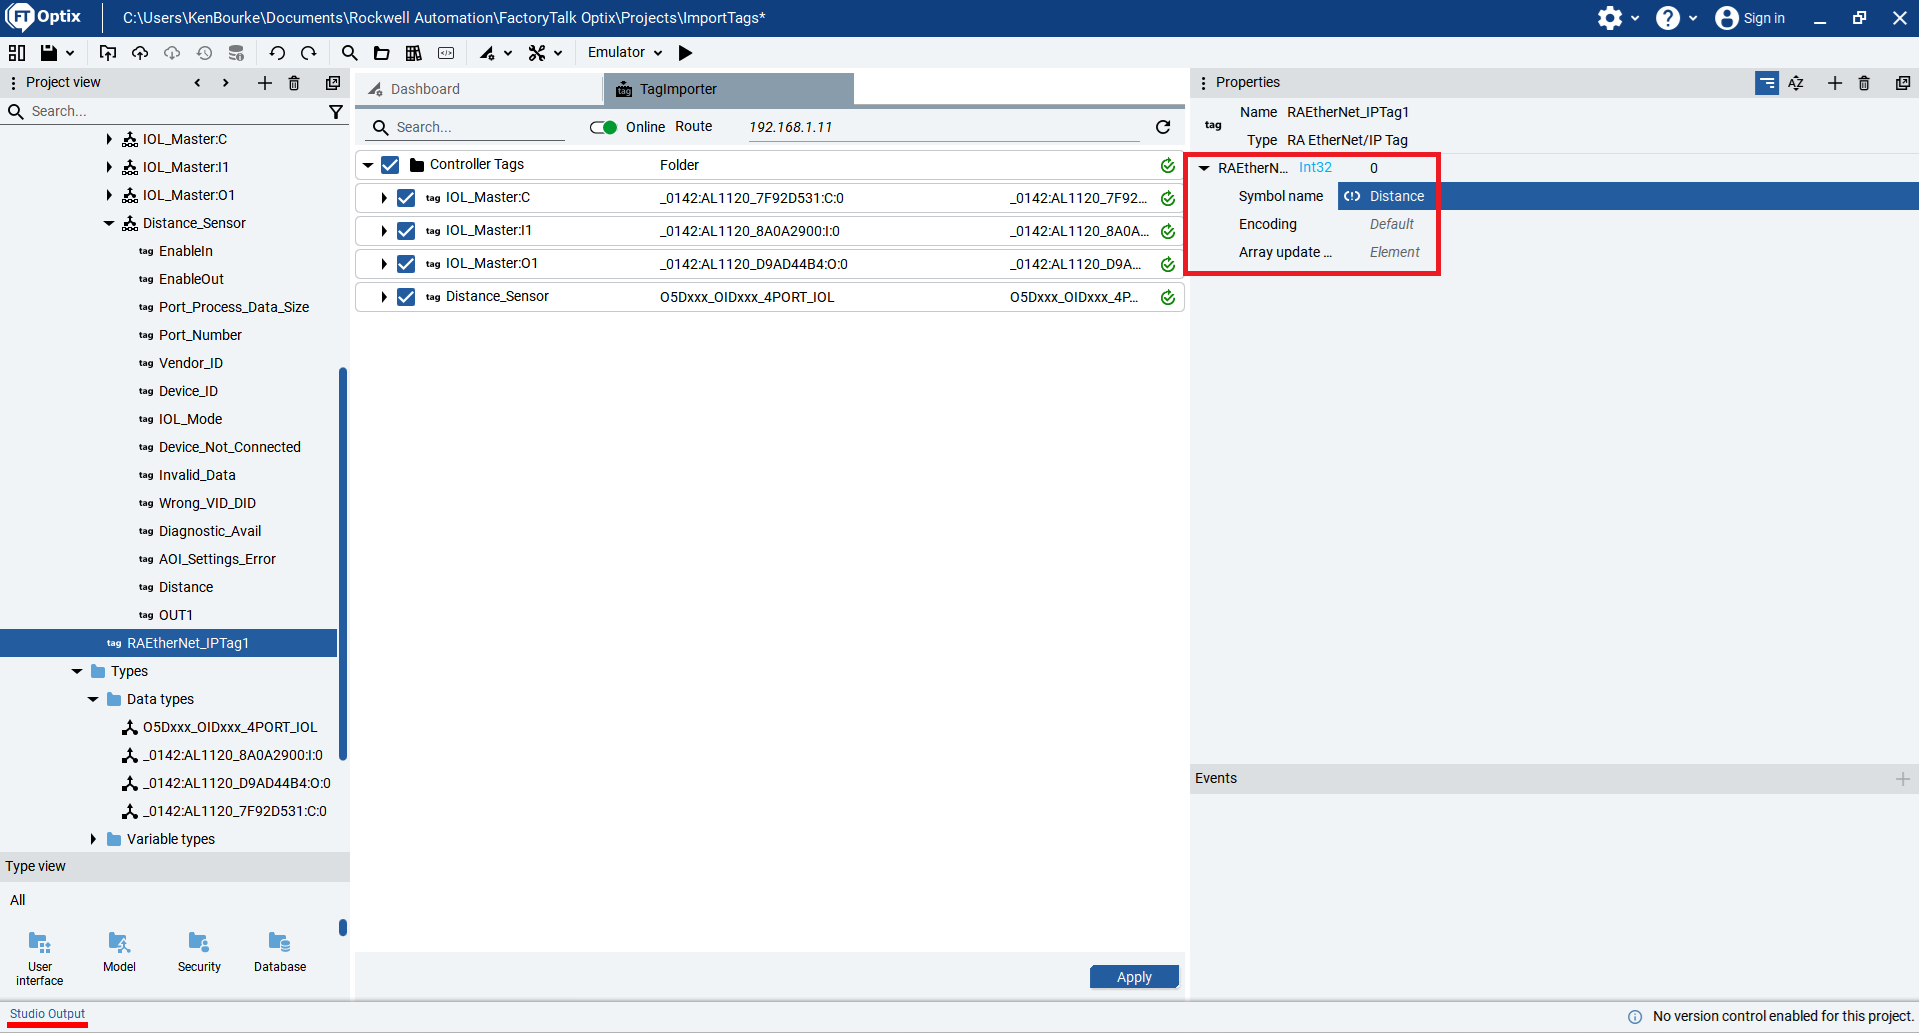
In the Properties Panel for the tag, you can check the Data Type and Symbol Name of the tag. The Symbol Name is the name of the tag in the PLC.
In this video, you learned how to import PLC tags to a FactoryTalk Optix project.
After watching, you should know how to add a communication driver and station to a project. You should also know how to import tags online, import tags offline, and manually create tags in the project.
Once the tags are in the project, you can start building screens that read and write tag values. I’ll cover how to build screens using panels and containers in my next video.
Get new content delivered straight to your inbox:
.png)