
In FactoryTalk Optix, there are a few different ways to build a navigation system for your HMI applications. In this tutorial, I'll show you how to implement a simple navigation system using a Panel Loader. This is very similar to using "Go To Display" buttons in FactoryTalk View.
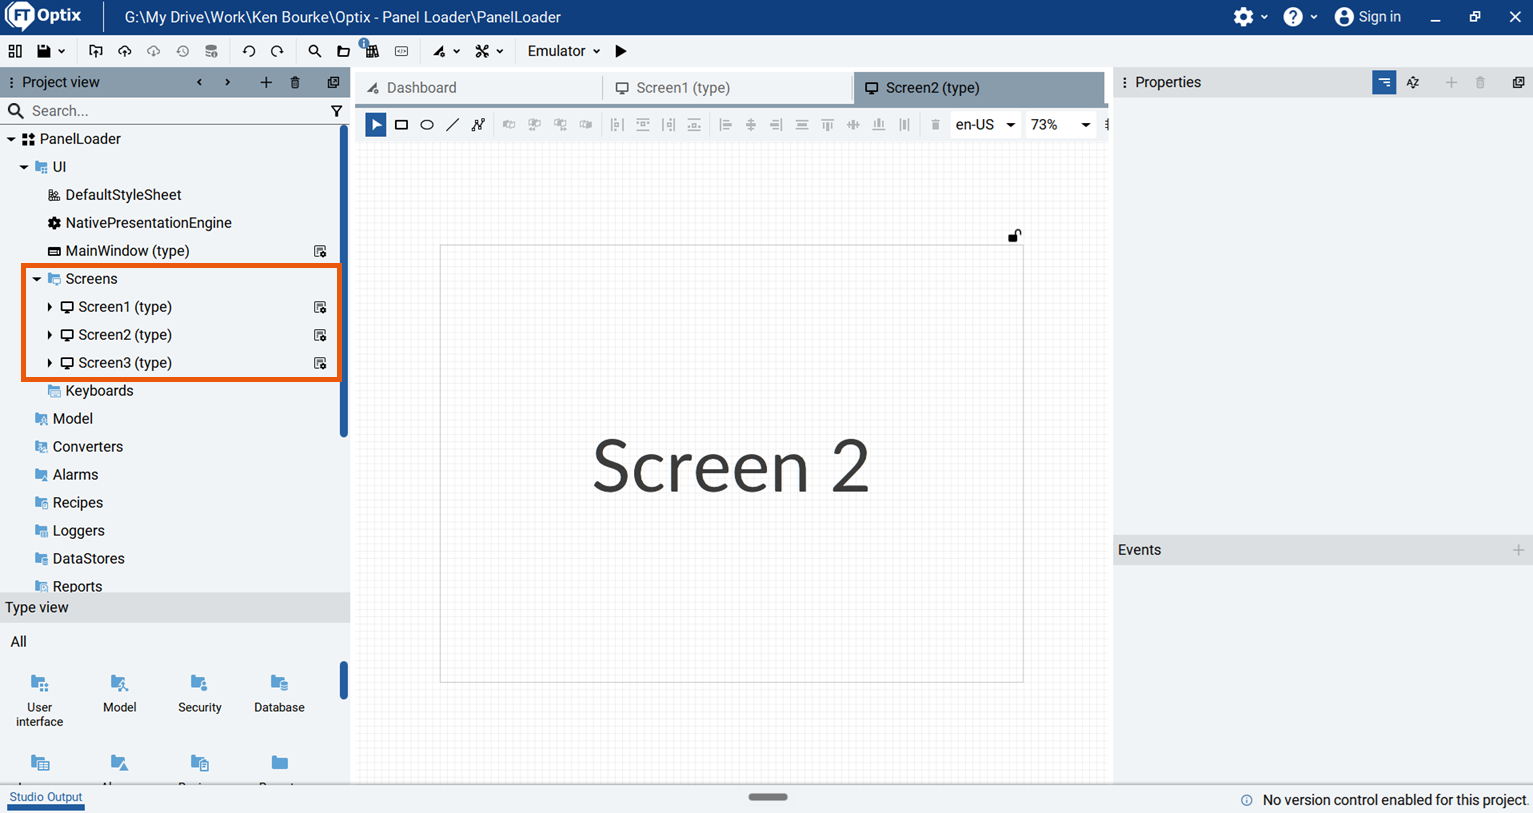
To start I've created a new project and added three screens. Each screen has some text to make it identifiable.
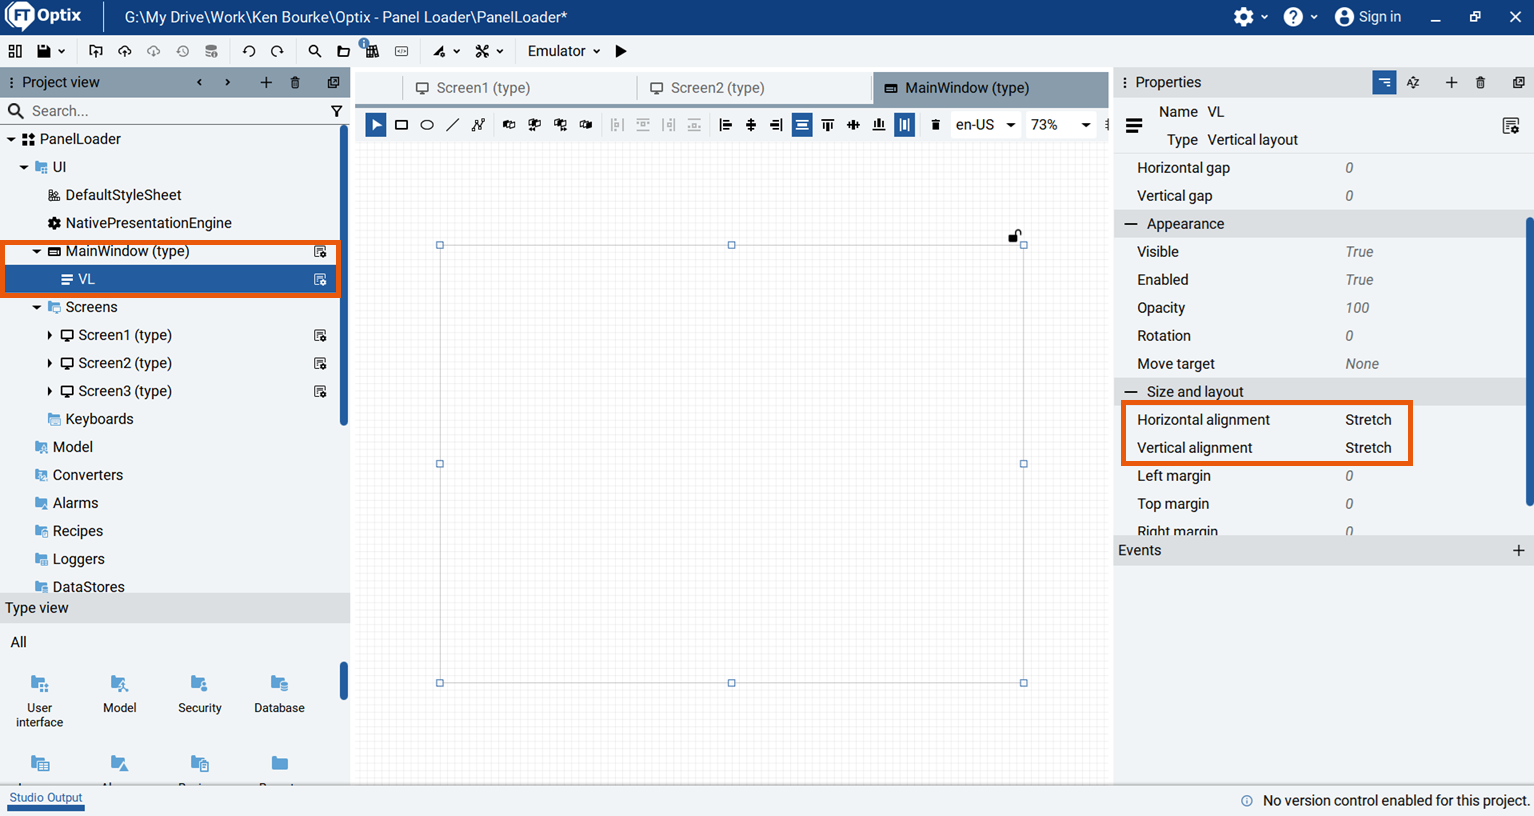
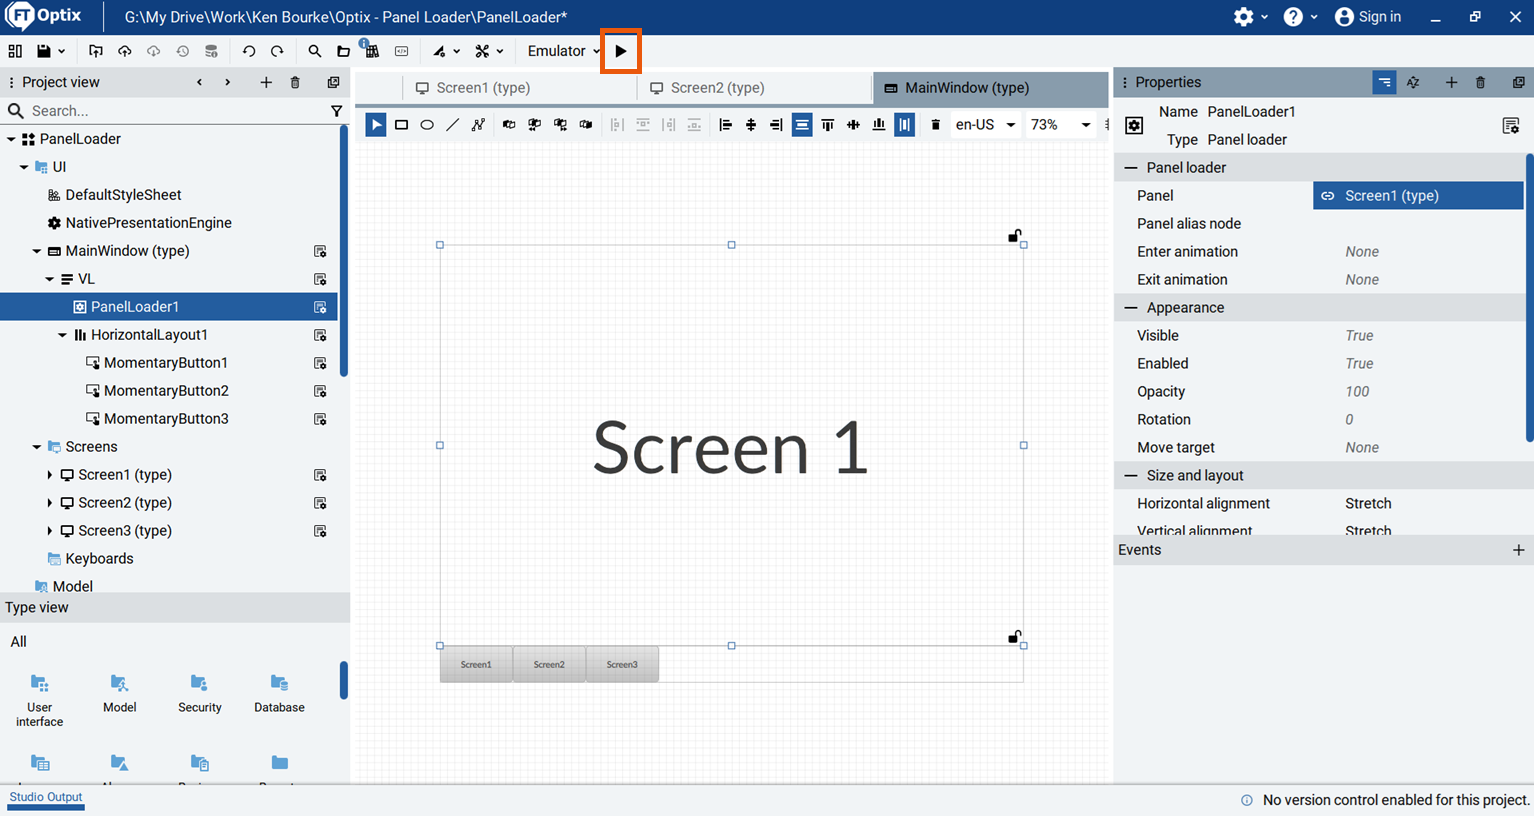
Next, I open the MainWindow and add a Vertical Layout. In the Vertical Layout's properties I set the Horizontal and Vertical alignment to Stretch and Stretch. This layout will be used to give the MainWindow some structure.
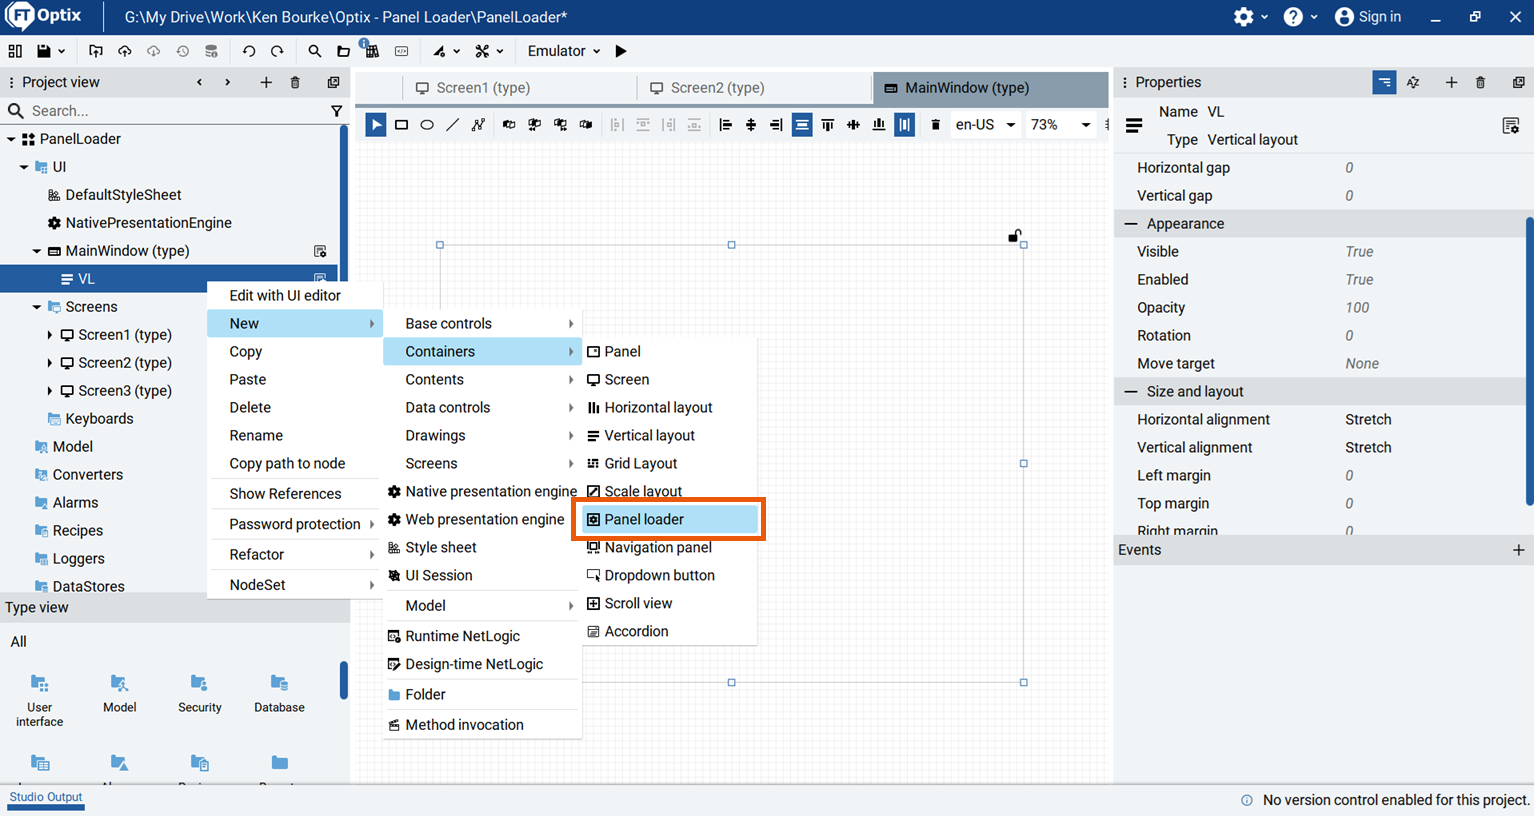
Then I add a Panel Loader container to the Vertical Layout and set its Horizontal and Vertical Alignment to Stretch and Stretch.
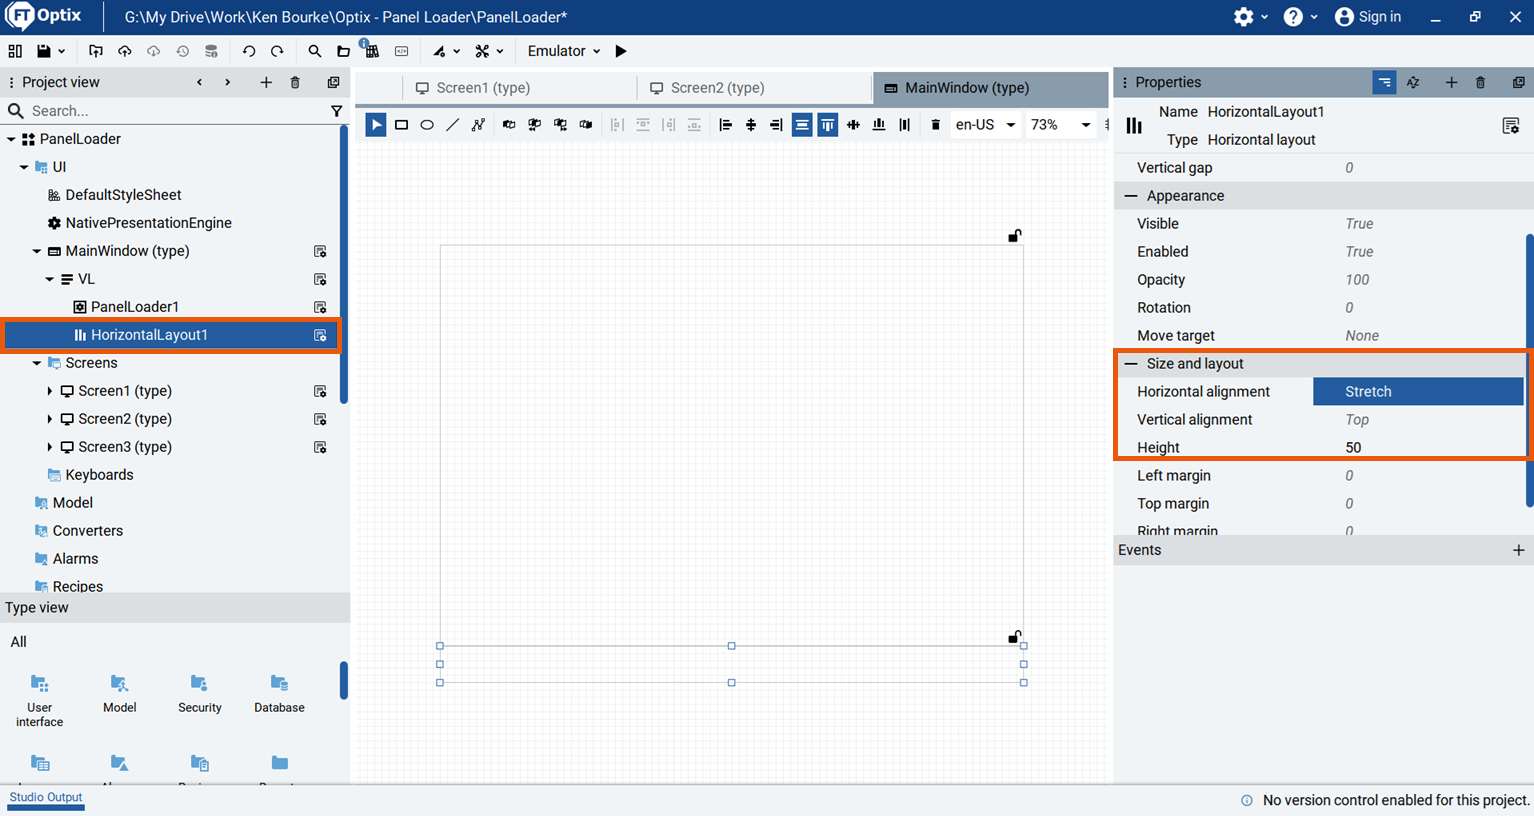
Next I add a Horizontal Layout to the Vertical Layout. The Horizontal Layout will be a container for the navigation buttons. I set the Horizontal Alignment to Stretch and the Height to 50.
In the Horizontal Layout, I add a Momentary Button and configure its Size and Text properties.
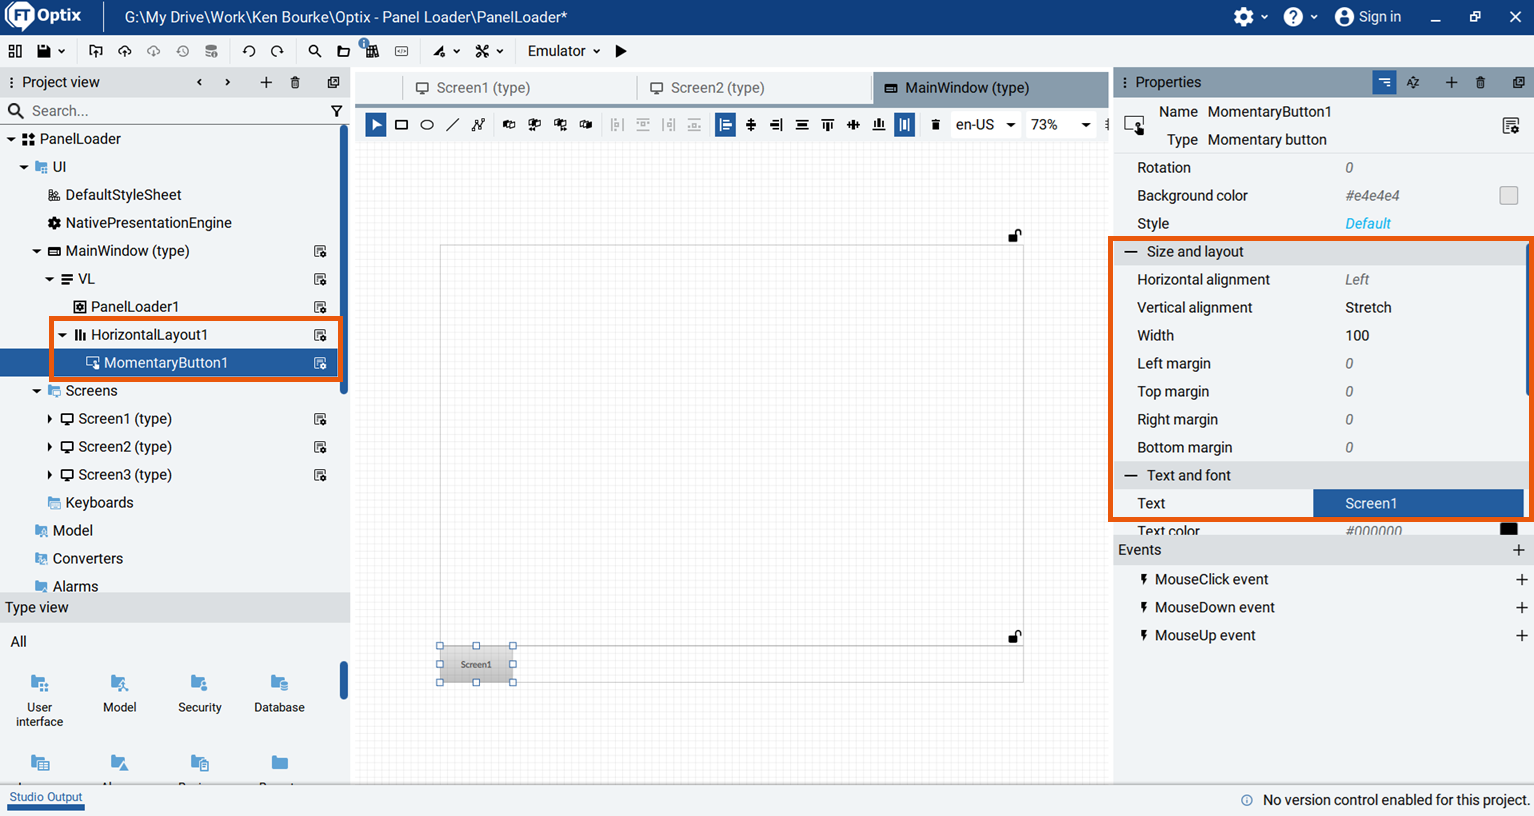
Then I add a mouse click event to the button by clicking on the plus icon beside the mouse click event node. I link the event to the Change Panel method of the Panel Loader.
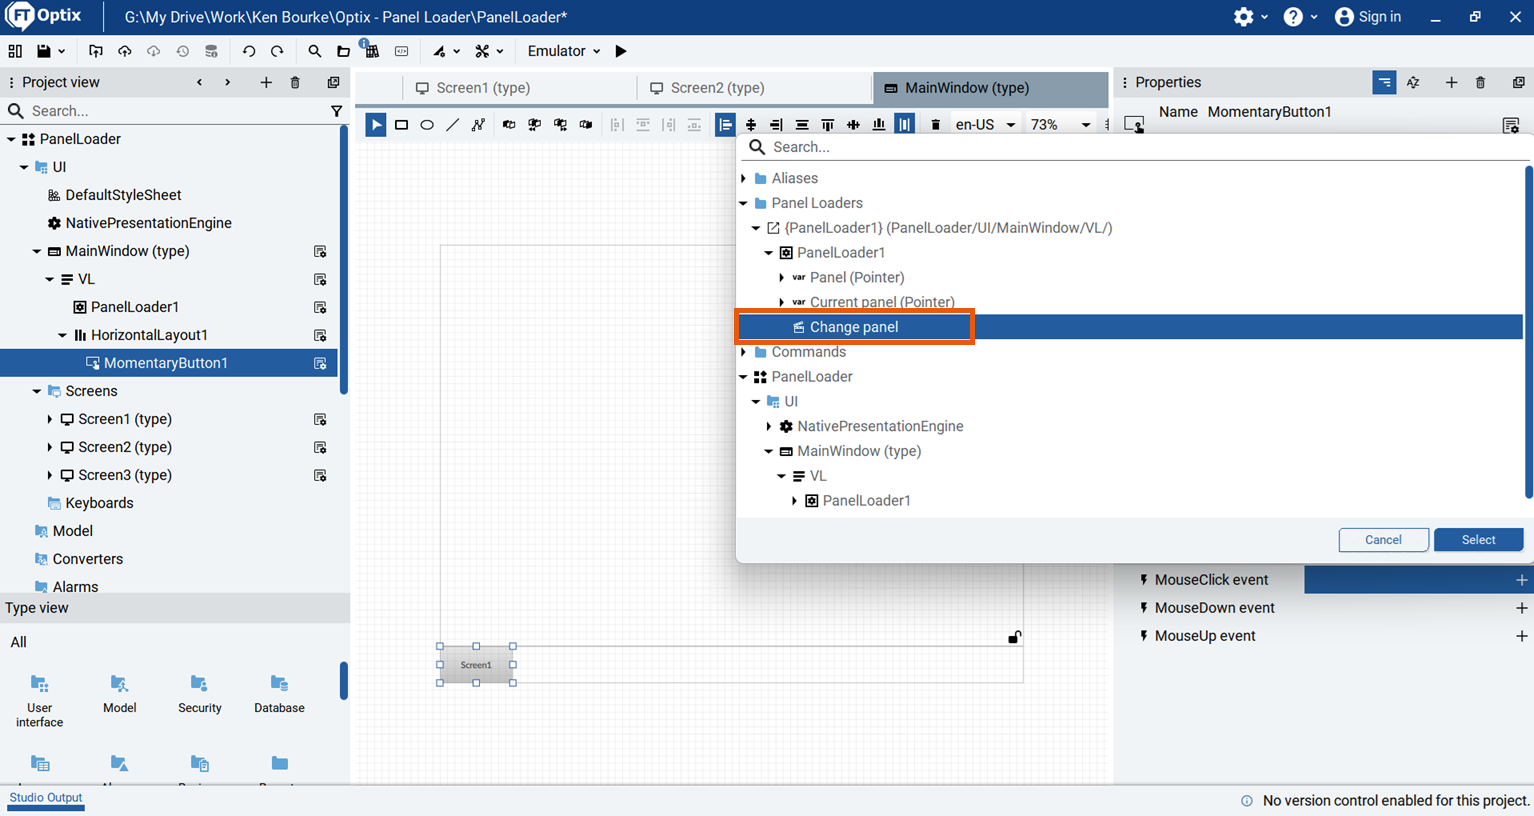
In the method's configuration, I set Screen 1 as the NewPanel argument.
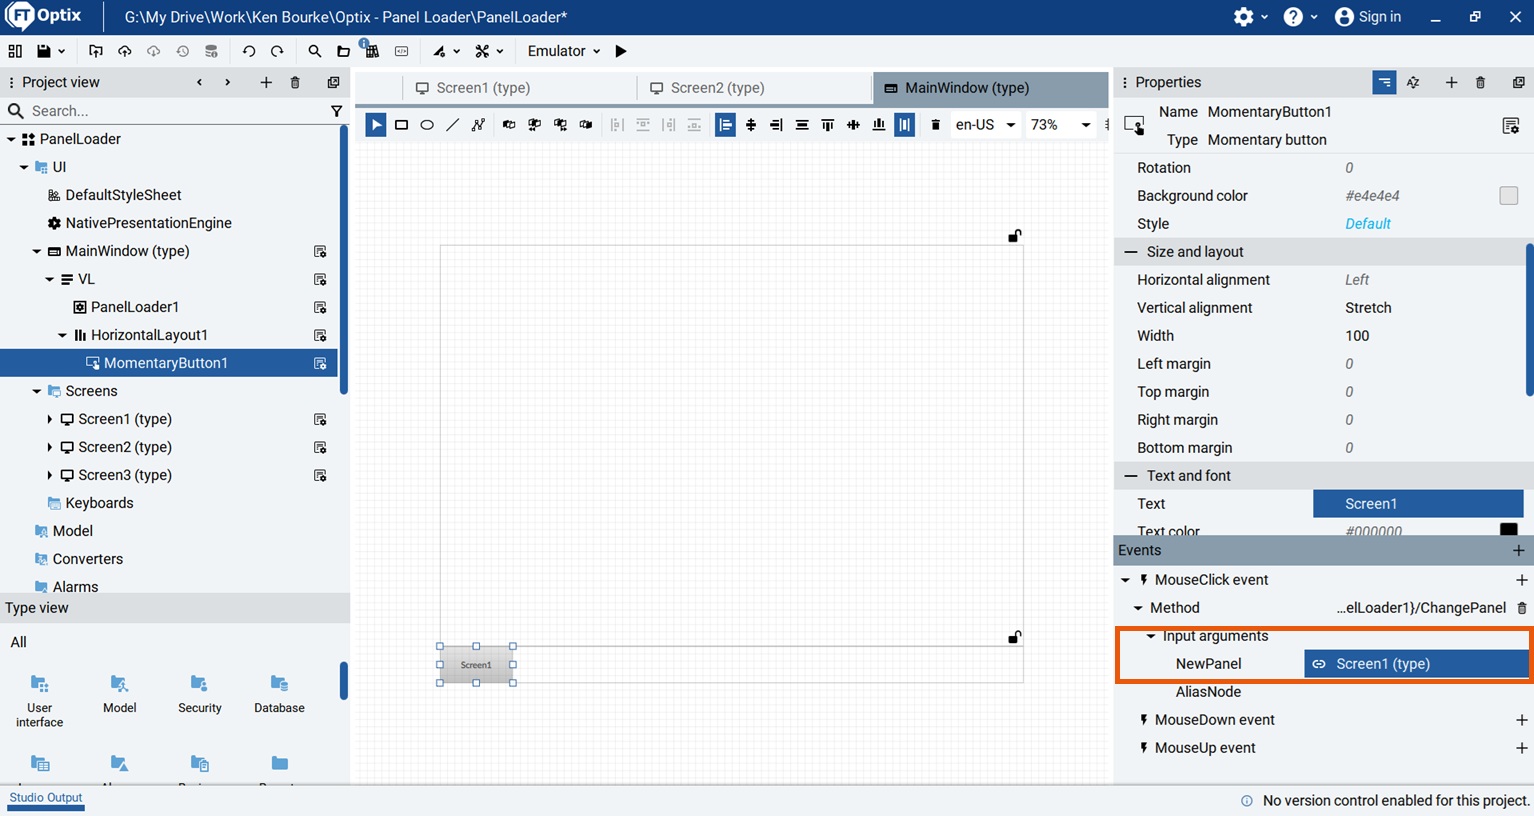
I repeat this process to create buttons for Screen 2 and 3.
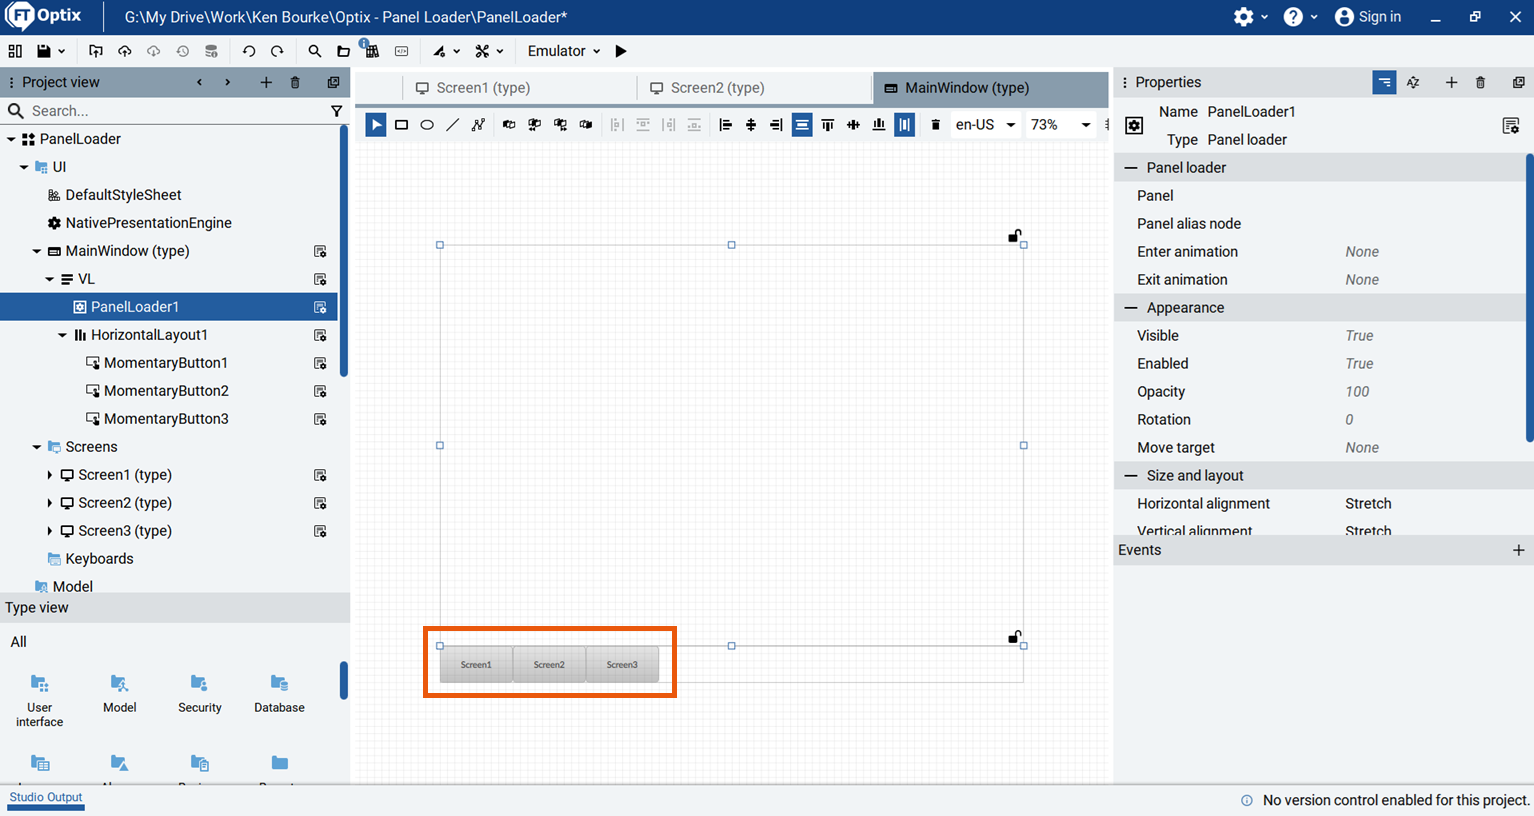
Finally I go back to the Panel Loader properties and set Screen1 as the default panel.
With my navigation buttons configured, I click the play icon to run the emulator.
In the running application, I verify that all of my navigation buttons work correctly and I can use them to navigate between the different screens.
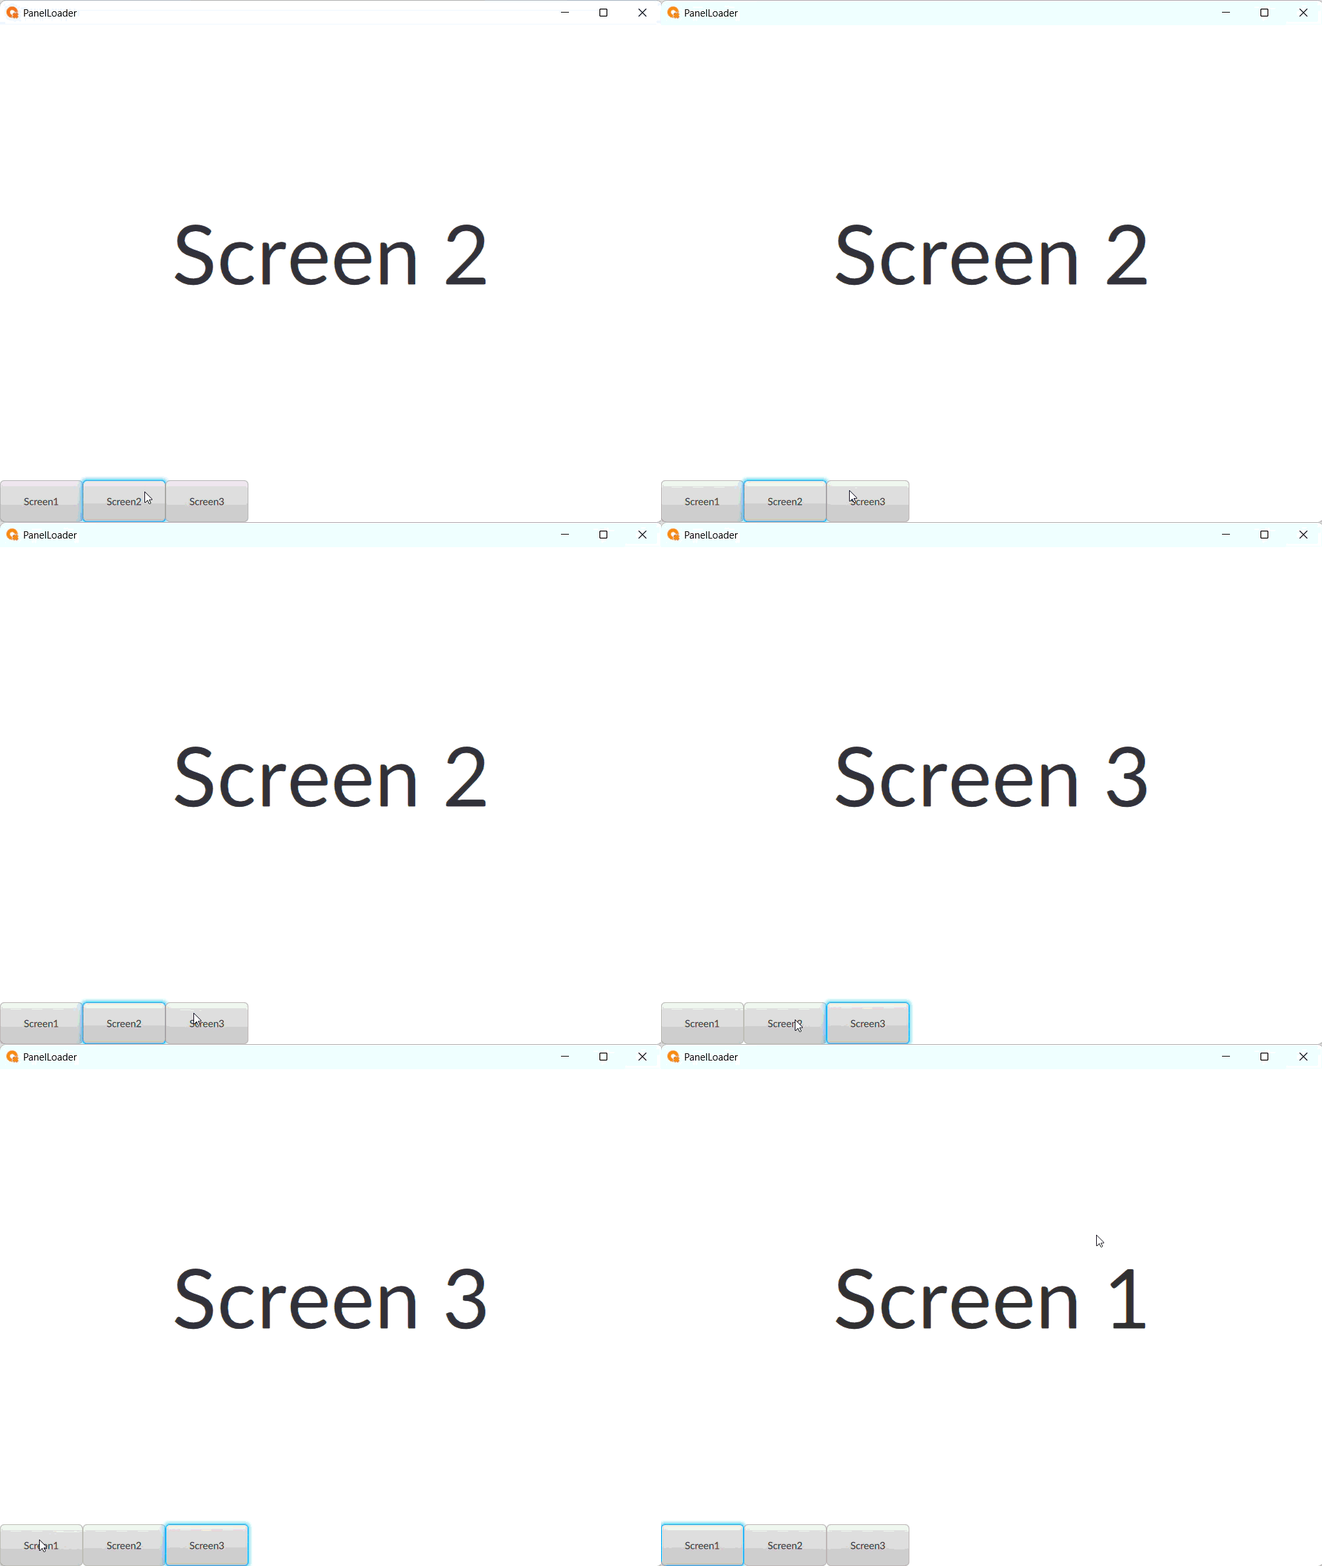
In this tutorial, I showed you how to configure a Panel Loader to navigate between screens in a FactoryTalk Optix application.
In my next tutorial, I'll show you how you can also use a Navigation Panel to build your navigation system.
Get new content delivered straight to your inbox: