
Studio 5000 Logix Designer: Version Control with Git
A detailed guide to use Rockwell Automation's VCS Custom Tools to implement Git based version control on a Studio 5000 Logix Designer project.
Studio 5000 Logix Designer
A detailed guide to use Rockwell Automation's VCS Custom Tools to implement Git based version control on a Studio 5000 Logix Designer project.
Get new content delivered to your inbox every month.
No spam, unsubscribe anytime.
Studio 5000 Logix Designer projects are stored as single binary ACD files on your computer. This design has some important advantages - projects are self-contained, hard to corrupt, and easy to email to your colleague at 2AM when a production line goes down. But binary files are also a version control nightmare.
It’s tough to do version control with binary files because the files can’t be compared by text-based version control systems like Git. Since its hard to use version control tools with binary files, most people skip version control altogether and don’t have a reliable way to record who changed a project, what was changed, when the change happened, or why the change was made.
To make it easier to use text-based version control systems like Git with Studio 5000 Logix Designer, Rockwell Automation has released a toolset that converts ACD files into version-control friendly text files and commits them to a Git repository. You can find that project here on GitHub.
Using these tools, you can:
You can also use these tools to restore a Logix Designer project from a Git repository to roll back unwanted changes.
In this post, I’ll show you how to use these tools to implement version control with Git for a Studio 5000 Logix Designer project.
First, let me cover some background information.
As part of the process, the VCS Custom Tools convert a Logix Designer project from a binary ACD file to a text-based L5X file.
An L5X file is an XML representation of a Logix Designer project or component of a project. Unlike binary files, L5X files contain human-readable content like:
<Rung Number="0" Type="N">
	<Text>
		<![CDATA[[XIC(DI_Start_BTN) ,XIC(DO_Run_MTR) ]XIO(DI_Stop_BTN)OTE(DO_Run_MTR);]]>
	</Text>
</Rung>L5X files work much better with Git because they are text files. When working with L5X files, Git can show you exactly what has changed in the file and can automatically merge changes from different developers in the same file.
The VCS Custom Tools don’t just convert a Logix Designer project to an L5X file - they explode your project into logical components.
RSLogix5000Content/
├── Modules/
│   ├── Local.xml/
│   ├── Inputs.xml/
│   └── Outputs.xml/
├── Programs/
│   ├── Routines/
|   |   └── MainRoutine.xml
│   └── MainProgram.xml
├── Tags/
│   ├── DI_Start_BTN.xml/
│   ├── DI_Stop_BTN.xml/
│   └── DO_Run_MTR.xml
└── Tasks/
└── MainTask.xmlNow, instead of one massive file, you have organized components so you can easily see what has been modified at a glance.
If you’re not familiar with Git, it is a distributed version control system that’s perfect for any text-based project - including our exploded PLC project.
By using Git, you get a full history of every change ever made to a project, a solution for creating remote backups, and the ability to restore a project to a previous state if required.
Git is not difficult to start working with, but there are some key concepts that you need to know:
A Repository, or repo, is a smart folder that tracks every change that has ever been made.
When you make changes to a project, you commit those changes to your local repository. A commit is a snapshot of your project at a specific point in time that can be restored.
To back up your changes, you can push your changes to a remote repository which is usually hosted on GitHub or BitBucket.
If another developer pushes changes to the remote repository, you can pull those changes into your local repository.
Git also supports the concept of branching, where you create a branch, which is a parallel version of your project that can be merged back into the main project later on or deleted.
Now that we have the basics covered, let’s set up our environment and start using the VCS Custom Tools.
To use Rockwell Automation’s VCS Custom Tools, you will need to have the following software installed on your computer:
You can download the .NET 8.0 SDK from Microsoft’s website here and Git from Git’s website here.
When you install Git, there are a lot of options that you can configure. My advice is to accept the default settings.
After installing Git, you should tell it who you are. You can run the following commands to set your name and email address. This information gets attached to every commit that you make
git config --global user.name "Your Name"
git config --global user.email "your.email@company.com"To use the VCS Custom Tools, we have to clone the GitHub repository and build the tools on our computer. You can do that using the following commands:
# Clone the repository
git clone https://github.com/RockwellAutomation/ra-logix-designer-vcs-custom-tools.git C:\VCS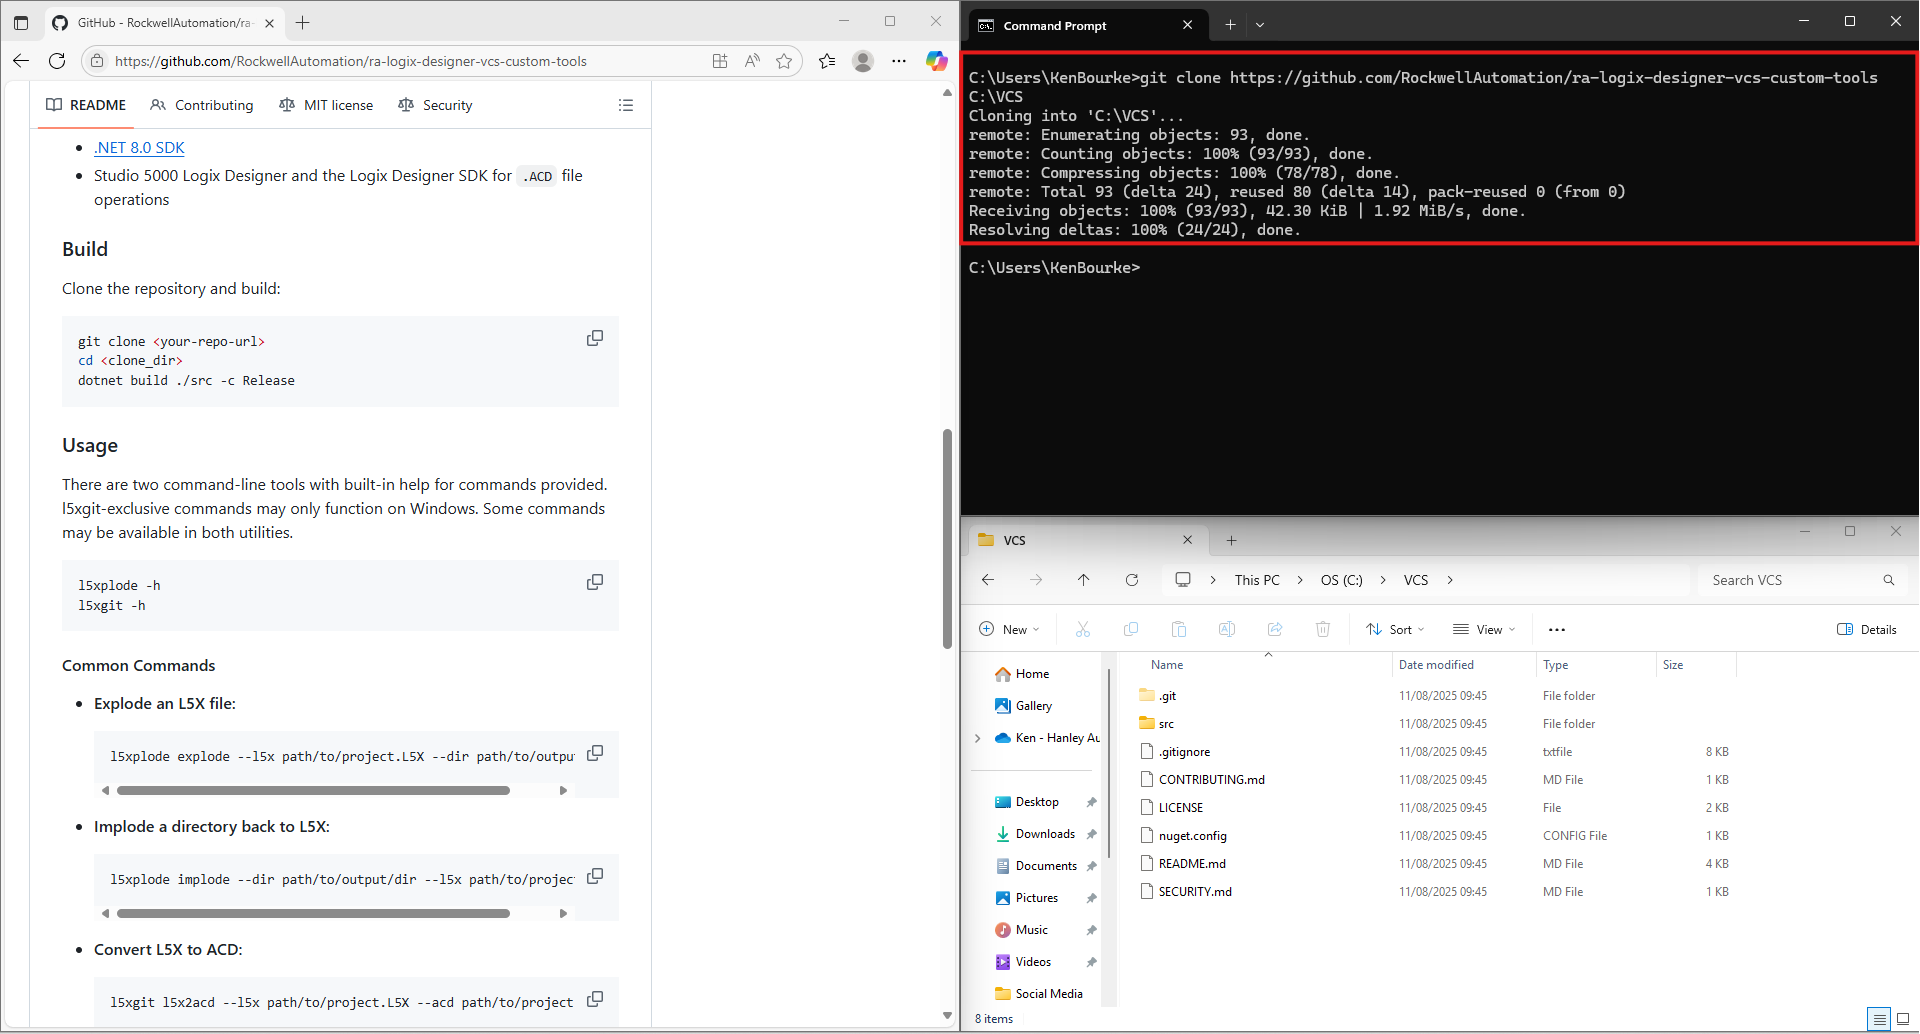
# Navigate into the folder
cd C:\\VCS
# Build the solution
dotnet build ./src -c Release.png)
Now we can use the VCS Custom Tools with a Logix Designer project.
The first thing we have to do is set up a Git repository for the Logix Designer project.
I can do that by creating a new folder using the mdkir command and then initializing a Git repository using the git init command.
# Create a new folder
mkdir Test

# Navigate into the folder
cd Test

# Initialize the repository
git init
.png)
Now I can commit changes to a Logix Designer project using the VCS Custom Tools. Using the l5xgit commit command.
C:\VCS\artifacts\bin\Release\l5xgit commit --acd C:\VCS\VCS.acdThe first time you run this command, you will have to specify the location of the git repository and if a commit message is mandatory for each commit. This configuration information is stored in a yml file in the same location as the Logix Designer project.
.png)
The commit command takes a very long time to run. The bottleneck seems to be the time that it takes to open the Logix Designer project using the Logix Designer SDK.
The good news is that the tool creates a copy of the project so you can continue to work in the Logix Designer project while the tool runs in the background.
Eventually, the process finishes and you can see your exploded L5X file in your Git repository.
.png)
If you wanted, you could push these changes to a remote repository to create an offsite backup of the project.
If needed, you can restore a project from the last commit using the l5xgit restore command.
This command implodes your Git repository into an L5X file and then converts that L5X file back into an ACD file.
It should go without saying, but you have to close the project in Logix Designer for the restoreacd command to work.
C:\VCS\artifacts\bin\Release\l5xgit restoreacd --acd C:\VCS\VCS.acd.png)
As well as using the tools in the command line, you can integrate them into Studio 5000 Logix Designer by adding them to the Custom Tools Menu.
To do that, copy the CustomMenu.xml file from the folder C:\VCS\artifacts\bin\Release\Assets and paste them in the folder C:\Program Files (x86)\Rockwell Software\RSLogix 5000\Common\
.png)
When you restart Logix Designer, you will see that all of the VCS Custom Tools and now available on the Tools menu.
.png)
When you run the commands from the Tools menu, a Command Prompt window opens that allows you to enter a commit message and shows the status of process.
Once again, you can continue to work in Logix Designer while the command is running.
In this post, I’ve shown you how to use Rockwell Automation’s VCS Custom Tools to use Git as a version control system for Studio 5000 Logix Designer projects.
A proper version control system like Git offers a ton of benefits over the traditional archives on a server approach to backing up PLC projects. With Git, you get a complete change history of a project along with the ability to restore the project to any previous state. This history includes the context of who made a change, when they made it, and why they made it, which is incredible useful for software that has to be maintained over a long period of time.
Unfortunately, the speed of the Logix Designer SDK is a real bottleneck in this process.
There are two changes that Rockwell could make to improve this process:
Until either of those improvements are made, I will continue to use these tools and take a lot of coffee breaks while commits are being made.